Troubleshooting a Noisy / Jagged Total Gas Curve in Gas Chart or iBallRemote.com on the Bloodhound
PRE-CONDITIONS:
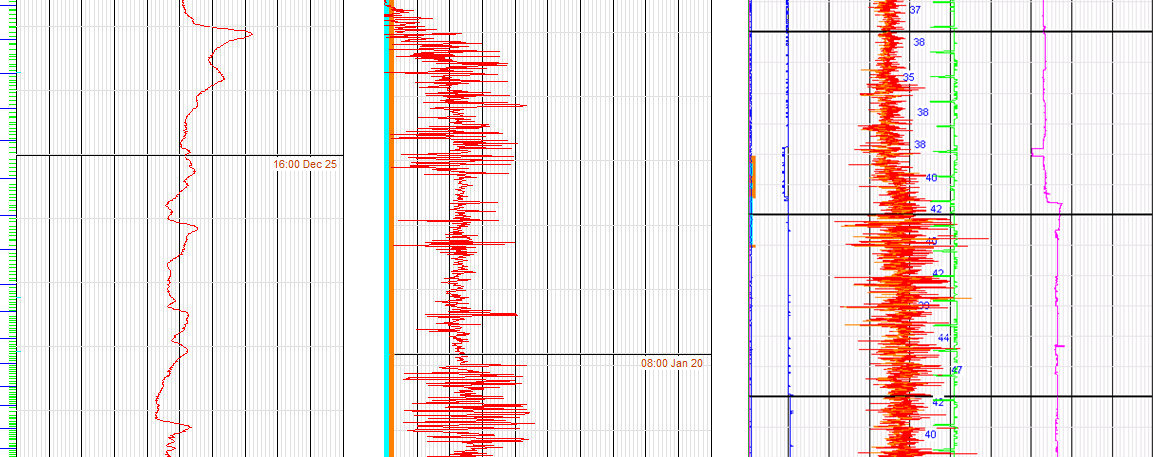
The image below shows two gas reading curves over time and is extracted from iBall Instruments’ Gas Chart software in several different situations. The left hand side of the image shows a normal gas sensor curve with gradually flowing lines indicating the gas being read. The middle is showing a moderate amount of noise in the curve, and the right side is showing a very noisy curve.
Obviously, this will not give you an accurate gas reading, so in this article, we will cover some of the common, and not-so common sources of this problem and some troubleshooting steps.

PREREQUESITES TO TROUBLESHOOT:
1) This is a troubleshooting guide for the Bloodhound Series 5 unit.
2) You will need to be on-site with the Bloodhound in order to conduct the majority of these steps.
3) If you are only executing step 1 below, and doing so remotely, you will need:
a) a good Internet connection,
b) administrative access to the Bloodhound instrument, and
4) A copy of iBall Instrument’s Standalone Real-Time Data Viewer (RTDV).
STEPS TO TROUBLESHOOT:
Troubleshooting is highly likely to be resolved in the first few steps. Here are some situations and things to try:
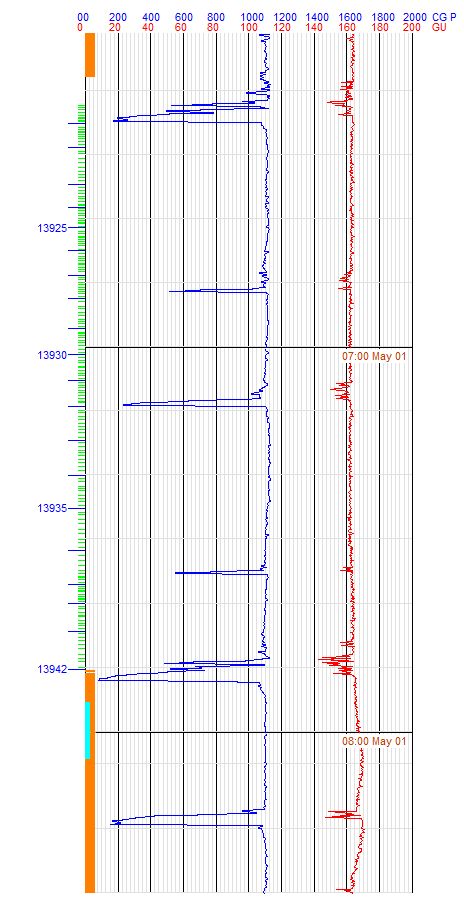
1) While the motors in the Bloodhound age, their brushes wear down. When they wear far enough, they can generate internal noise that will register in the gas sensors. An example of this is shown below where the blue line is the Chromatograph Pressure (CG P) and the red line is the Total Gas (GU) line. You can see that when the pressure drops on the chromatograph column due to intermittent pump failure, there is clearly a correlation to the “noise” in the total gas curve:

To eliminate this variable first, shut down the pump motors:
a) Open iBall Instruments Standalone Real-Time Data Viewer (RTDV).
b) Type in your Bloodhound Unit Number and click, “Connect to Server” – Make sure you have a good connection.
c) Click on “Two Way Inactive” and log in with administrative username and password.
d) Click on the “More Data” button to expand the window.
e) Click your mouse cursor in the lower-left portion of the screen with the yellow text scrolling by.
f) Type in (no quotes) “shutdown” and press the ENTER key.
g) You will see the message “Unit entering shutdown mode” if this is successful.
This means that the pumps are now shut down, and the Bloodhound *will* show an alarm, so forewarn any on-site loggers if you’re doing this remotely. Now that you’ve shut down the motors, check the line noise again and see if it is still present. If it *is* still present, then your source of noise is outside of the Bloodhound unit, and you should proceed to Step 2 below. If your noise has disappeared, then try these steps:
a) With your RTDV still open, now type “shutdown” and press ENTER again.
b) Verify that you get the message, “Unit exiting shutdown mode” to ensure the pump motors are back on. NOTE: You can also just reboot the Bloodhound and the pumps will come back on normally.
c) Set Register 10 to 180 and observe the line noise situation again. By setting the sample motor manually to a high speed, the noise will often be dissipated or even eliminated.
d) If this does not work, try swapping motors with the spare provided in the Bloodhound to see if the line noise dissipates.
2) The most common occurrence is an outside source of radio frequency (RF) noise. If these can be moved as far away from the bloodhound or better yet turned off entirely, this will solve the problem in about half the cases. Common sources of RF noise that we have seen:
3) Another source of RF noise is the Bloodhound Cellular Antenna itself. The cord provided with the Bloodhound’s Cellular Antenna is set to a length that slightly exceeds the recommended distance the antenna should be from the Bloodhound in order to avoid this noise situation. If your Bloodhound antenna is not as far away from the Bloodhound as it can possibly be, please make sure to correct this, and put as much distance/metal in between the two as possible.
4) Any breakage in the connection for the Bloodhound Antenna (as mentioned in the above step) effectively “shortens” the antenna length, and means that the actual source of RF is significantly closer to the Bloodhound unit. Look for the following:
a) Any actual breakage in the Cellular Antenna cord. Most commonly, we see this where the antenna has been routed through a window or wall and it’s broken over time.
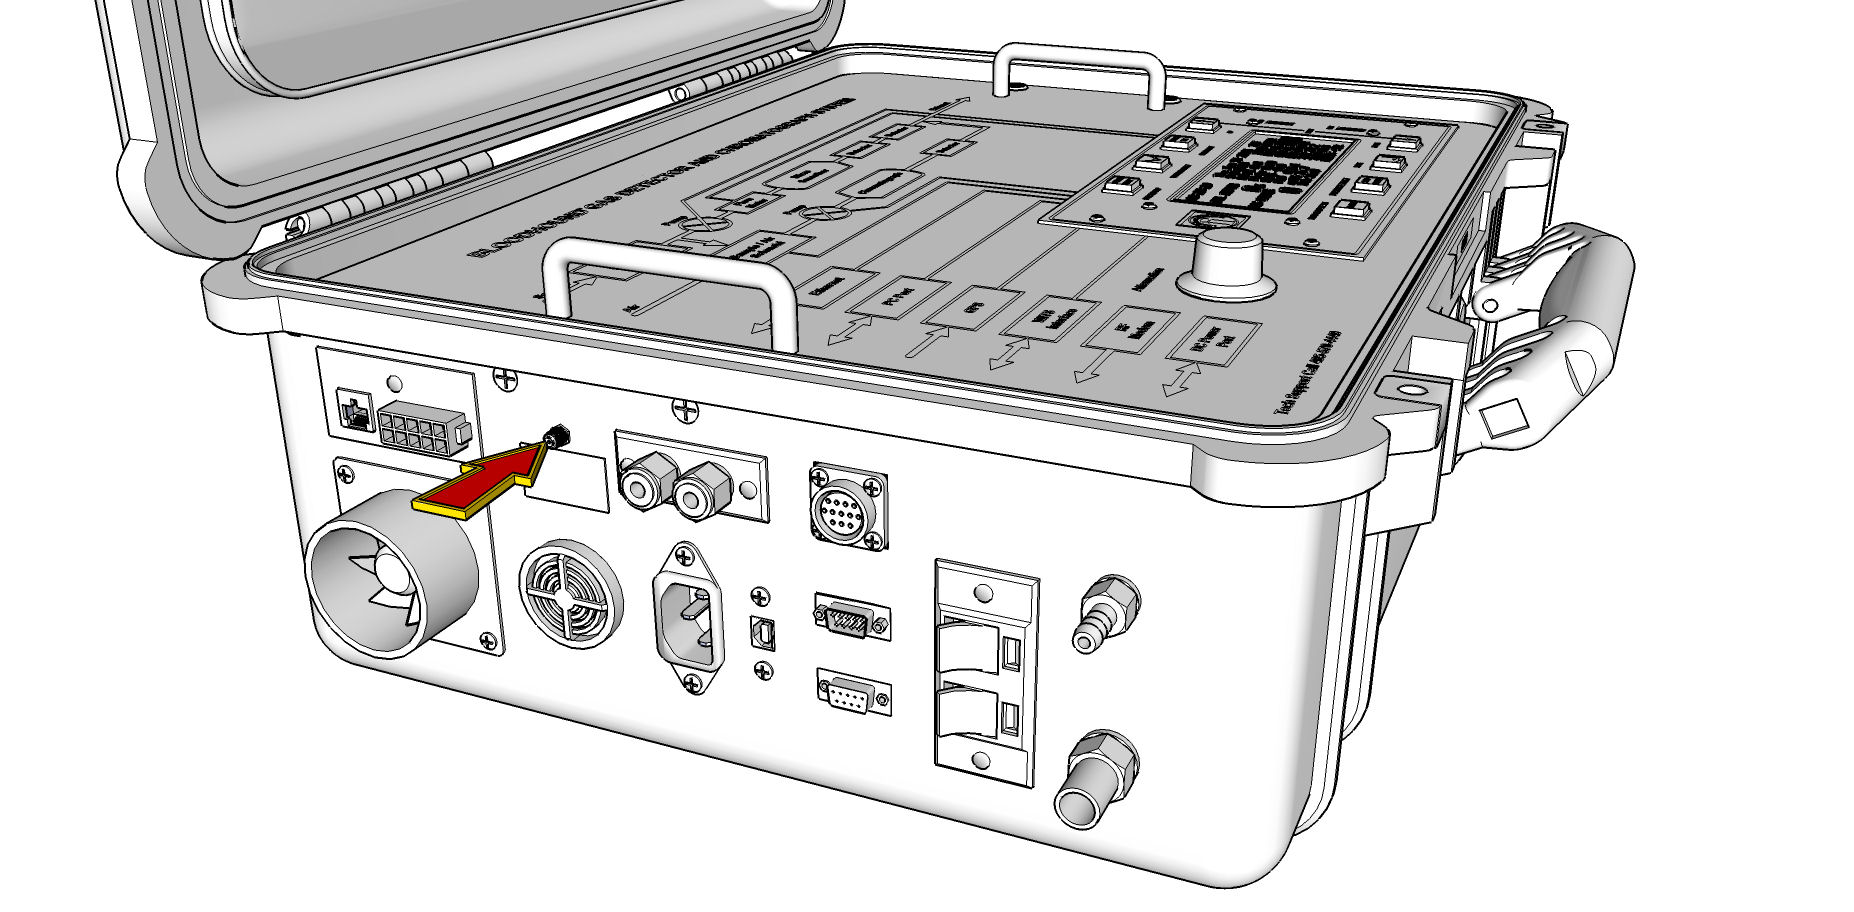
b) Make absolutely that the “double-collar” connection to the Bloodhound unit from the antenna is tightened – make sure they are BOTH tightened (See image below for the location of the most suspicious connectors).
c) You can also try replacing the Cellular Antenna attached to the Bloodhound with another one to see if this solves the problem.
d) Opening the front panel to the Bloodhound with the four Phillips-head screws will allow you access to the Bloodhound’s internal connections for the Cellular Antenna. Make sure these connections are tight.

5) NOTES ON THE DC CAVITATOR:
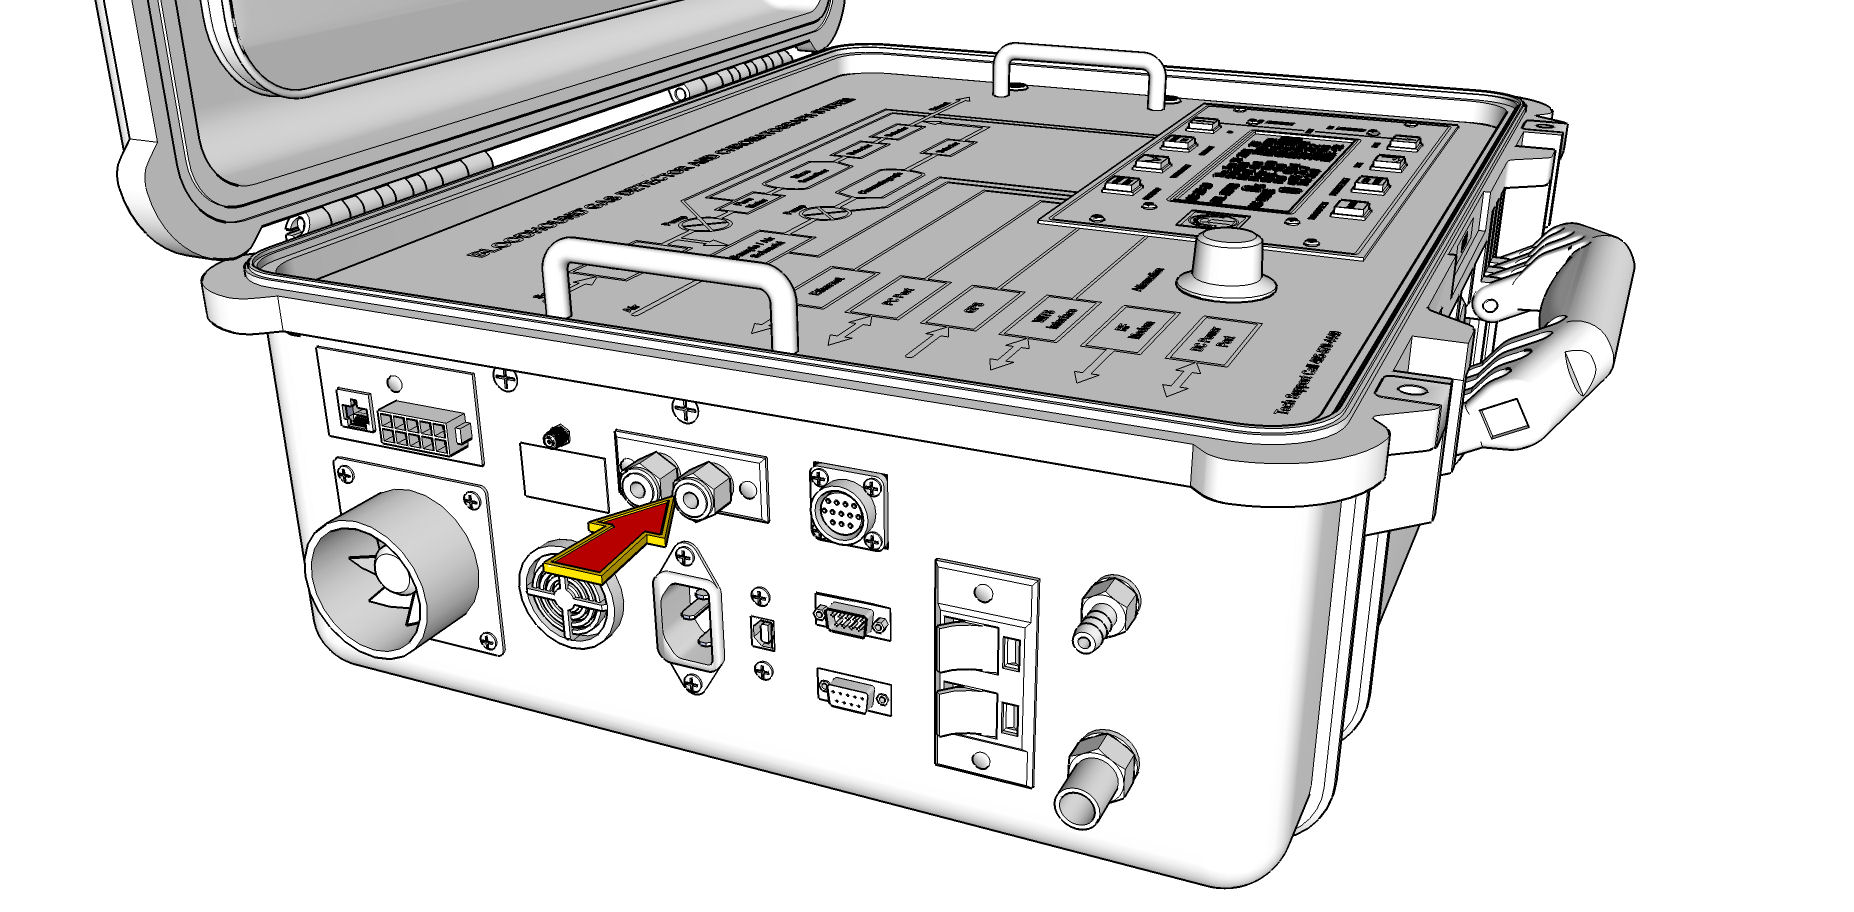
If you are using the DC Cavitator (a DC-driven agitator that derives its power directly from the Bloodhound), there have been several cases where this particular situation has produced noise. You can identify whether you have this setup by observing whether there are power lines to the Cavitator connected to the Bloodhound in the location identified in the image below:

a) Disconnect the DC Cavitator lines from the Bloodhound and observe whether the noise is eliminated. If the noise is eliminated by this step, continue with step
(b) below…otherwise the source is something else, and you should continue looking for outside sources of RF in the vicinity of the Bloodhound.
b) Walk the power line to the DC Cavitator – make sure there are not shorts or other suspicious bends, breaks, or raw wires.
c) In addition, look at your “DC AMPS” reading in the Real-Time portion of the Gas Chart program (Right-Click–>Gas Chart Control Box–>”Real Time Data” button). If this is excessively high, it points to a short in the line, which can definitely produce noise.
NOTE: If it *is* excessively high, you may even get a “HIGH AMPS” alarm on the Bloodhound.
d) If you have any of the scenarios described in step (c) above, consider replacing the wiring to the DC Cavitator. Otherwise, continue on to step (e) below.
e) If you have the option, replace the DC Cavitator and see if the problem subsides. If it does, the DC Cavitator is the source, and needs to be serviced.
f) If you do not have a spare DC Cavitator, you can look over the DC Cavitator to see if there are any obvious issues associated with balance, the motor bearings, or brushes. If you have a spare motor assembly, you can swap out the motor and see if that resolves the problem.
CONCLUSION:
Hopefully, this has solved your line noise problem. If not, please contact Bloodhound
Technical Support at 405.570.4449 for further troubleshooting ideas..