How to set the Bloodhound to Measure H2S (Local)
DISCLAIMER:
The Bloodhound’s ability to measure H2S (hydrogen sulfide) is strictly for the purpose of identifying it as a harvest-able gas. It is NOT EVER to be considered any kind of emergency warning system with regard to the gas, and should never be implemented as such. The simple mechanics of surface-line-lag alone are enough to cause significant delay in time between the point of an H2S show at the surface, and when it reaches the Bloodhound. If you feel H2S is a risk at all, it is critical to install proper warning and safety systems in addition to the Bloodhound, and not to consider the Bloodhound as a replacement of any kind for H2S safety devices.
IMPORTANT NOTE: By default, the H2S sensor on the Bloodhound is turned off. Every time the Bloodhound is rebooted, or powered down and powered up again, this value will be turned off, even if you had it on before it was restarted.
PREREQUSITES:
These are the requirements before setting up H2S on your Bloodhound:
1) You must be at the location with the bloodhound – this is not a remote tutorial.
HOW-TO:
Instructions on how to set the Bloodhound up to read H2S, how to zero that H2S, and how to get the WITS system properly setup so that third party H2S shows. NOTE: The H2S sensor is turned off (register 41 set to 0) by default. If not set in persistent mode (more below), every time the Bloodhound is rebooted and/or powered-off/powered-on, the reading of H2S will be shut off. If you turn the H2S sensor on (set register 41 to 1) and reboot the Bloodhound, it will be turned off again.
1) Setup the Bloodhound to read and display H2S:
a) Press the “up” and “down” arrow buttons on the right-hand side of the button bank on the face of the Bloodhound simultaneously to bring up a menu.
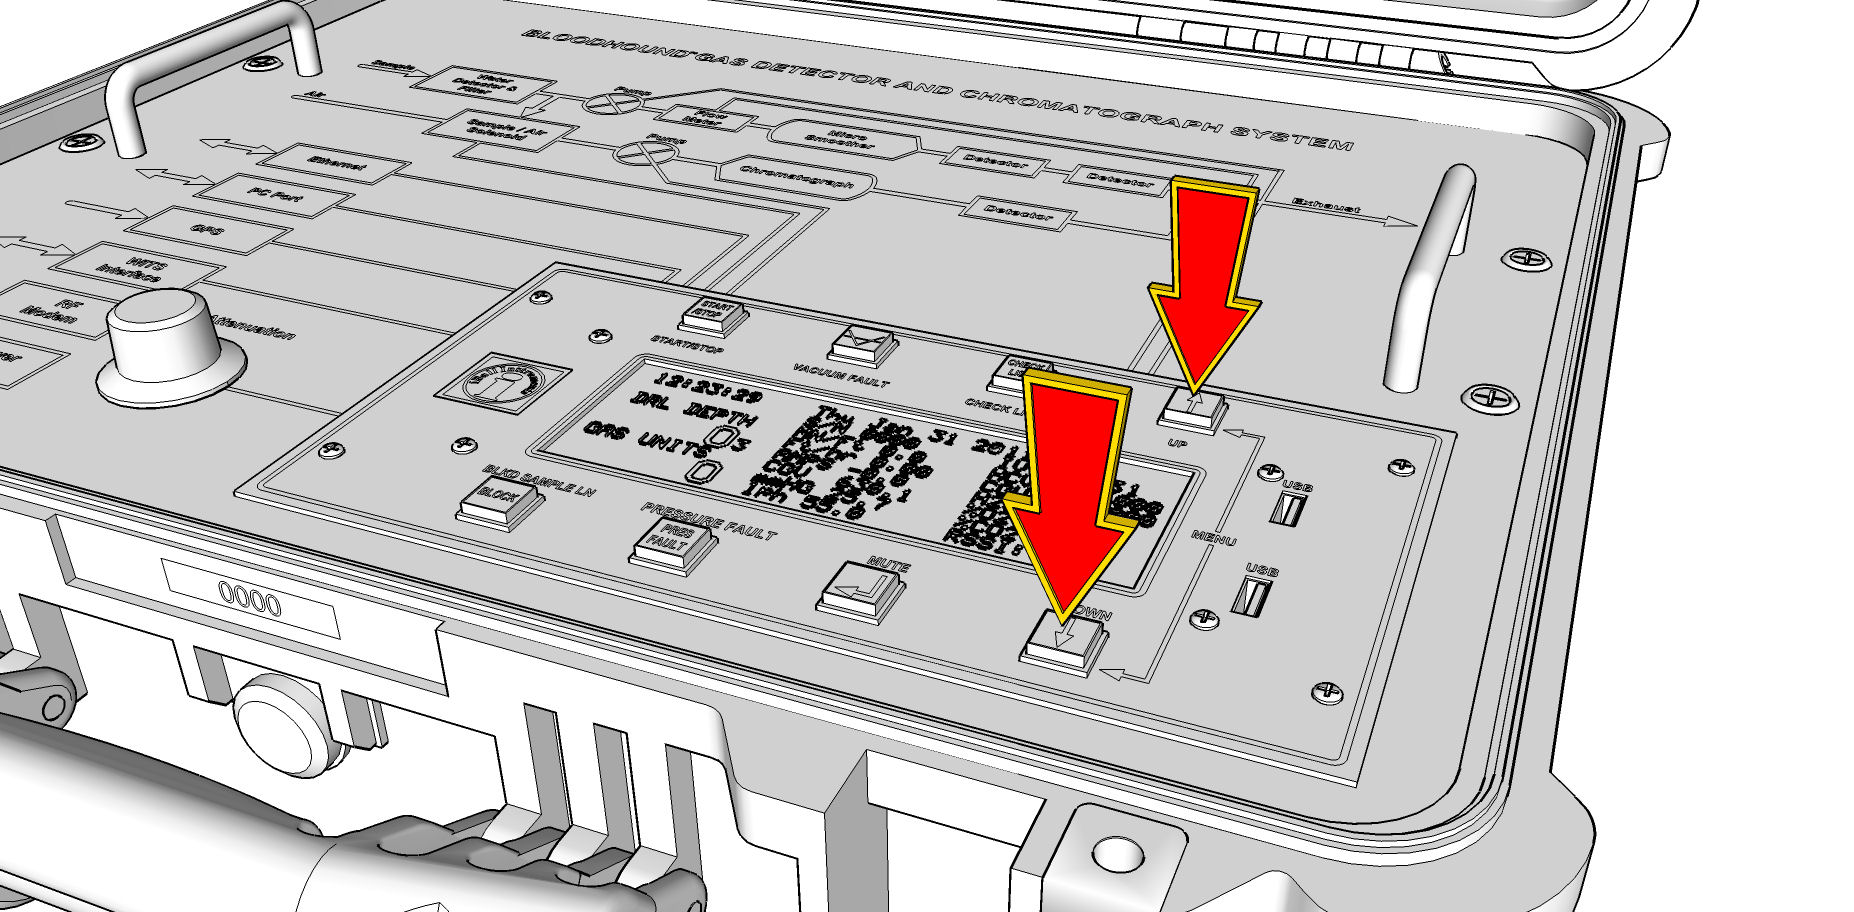
b) Use the “up” and “down” arrow buttons to go to the “REGISTER SETUP” menu item.
c) Press the “Enter/Mute” button to select this menu.
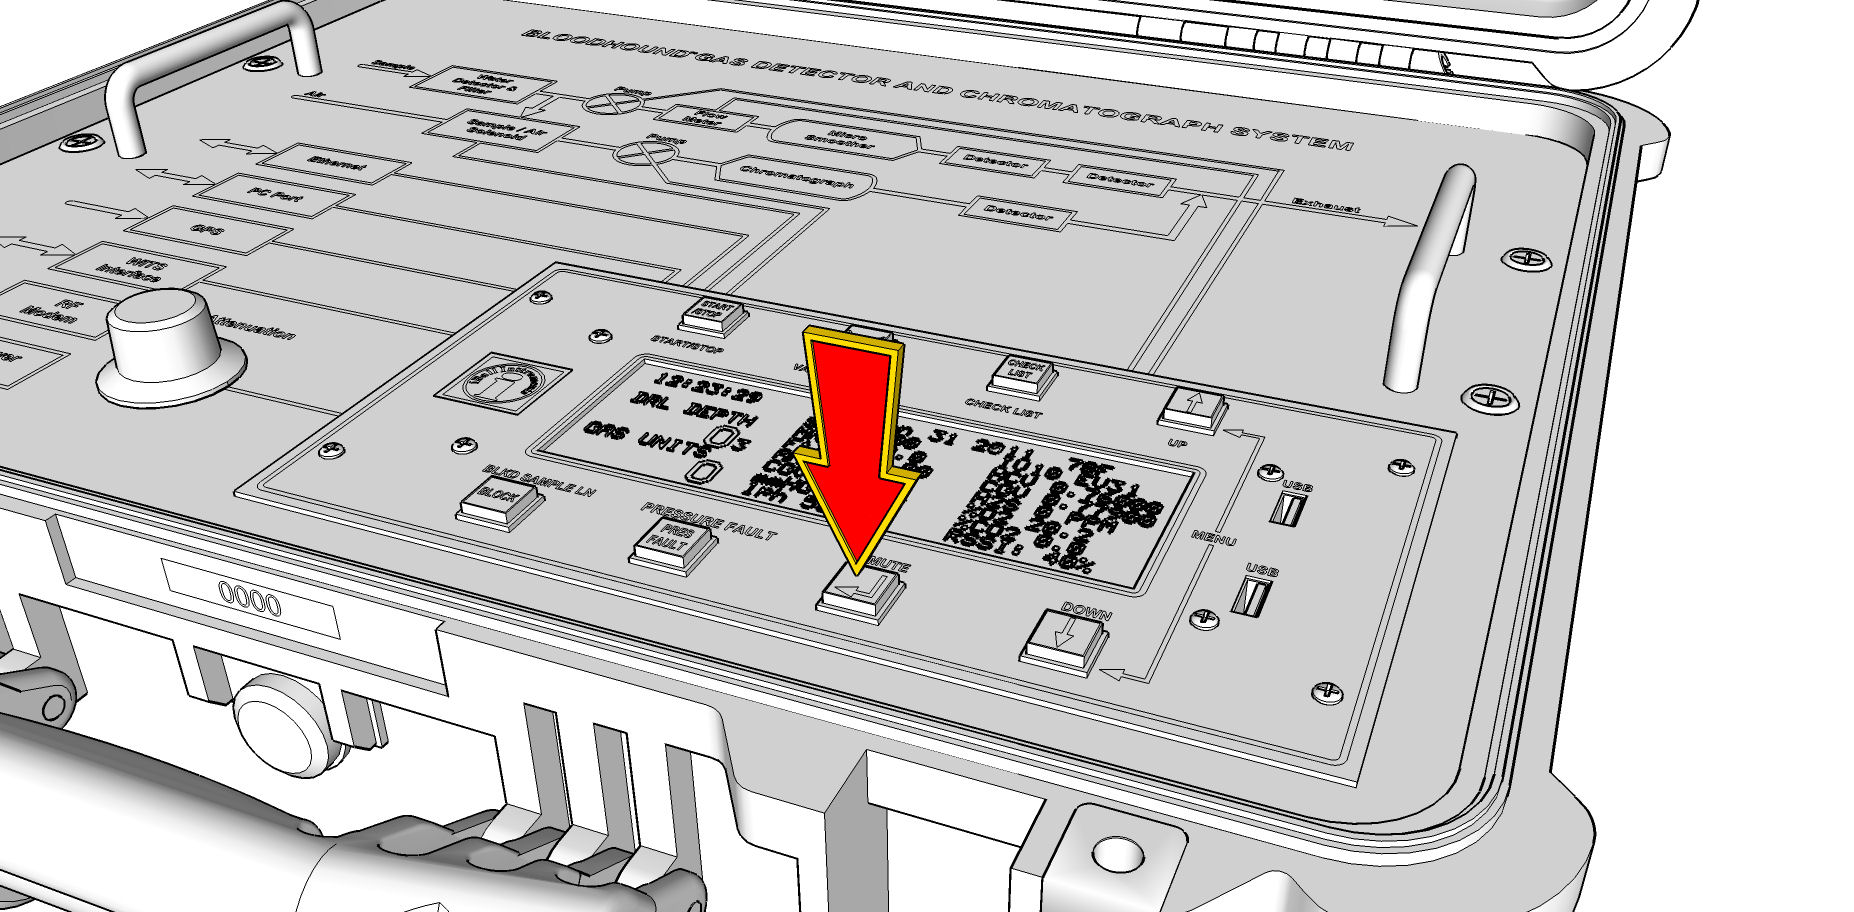
d) Use the “up” and “down” arrow buttons to go to REGISTER 41.
e) Press the “Enter/Mute” button to enter the “register edit” mode.
f) The three valid values for this field which can be used are:
| VALUE | WHAT IT DOES | WITS BEHAVIOR |
| 0 (zero) | Turns the H2S Sensor OFF | No H2S is sent to WITS. |
| 1 (one) | Turns the H2S Sensor ON until the next reboot of the Bloodhound. | H2S is sent to WITS over channel 1826. |
| 255 | Turns the H2S Sensor ON in persistent mode – it read and display H2S and will stay on through a Bloodhound Reboot | In firmware versions 207 and lower, NO H2S is sent to WITS. Firmware versions 208 and higher, H2S is sent to WITS on channel 1826 just as it is when set to “1” above. |
g) Use the “up” and “down” arrow buttons to change the value to “1” (or “255” – when
setting it to 255, it is easier to push the down arrow than the up one).
h) Press the “Enter/Mute” button, and watch closely to verify that the word “SET” appears.
i) If you saw the word “SET” and register 41 is set to “1”, then the H2S sensor has been turned on and the Bloodhound will now display H2S in PPM.
2) Zero the H2S Gas Reading:
a) Disconnect/Unplug the sample line from the Bloodhound:
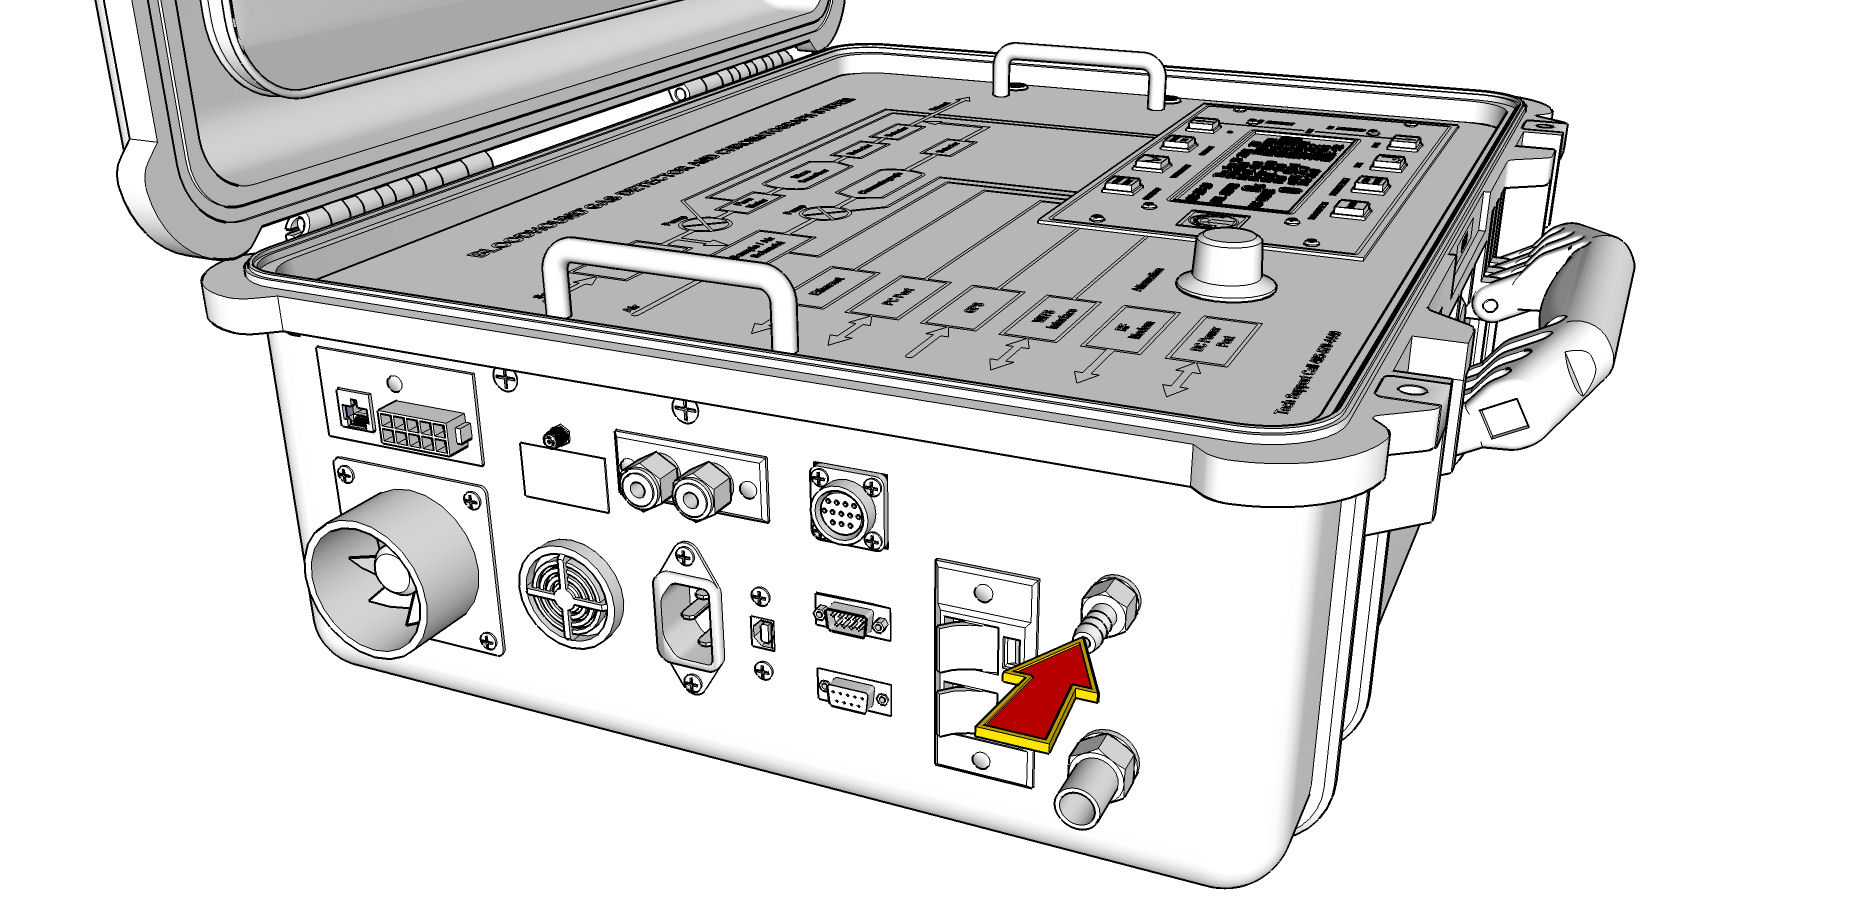
b) Wait approximately 2 minutes for the gas numbers to settle to the zero point you
have set for total gas.
c) Turn the knob until a menu comes up:
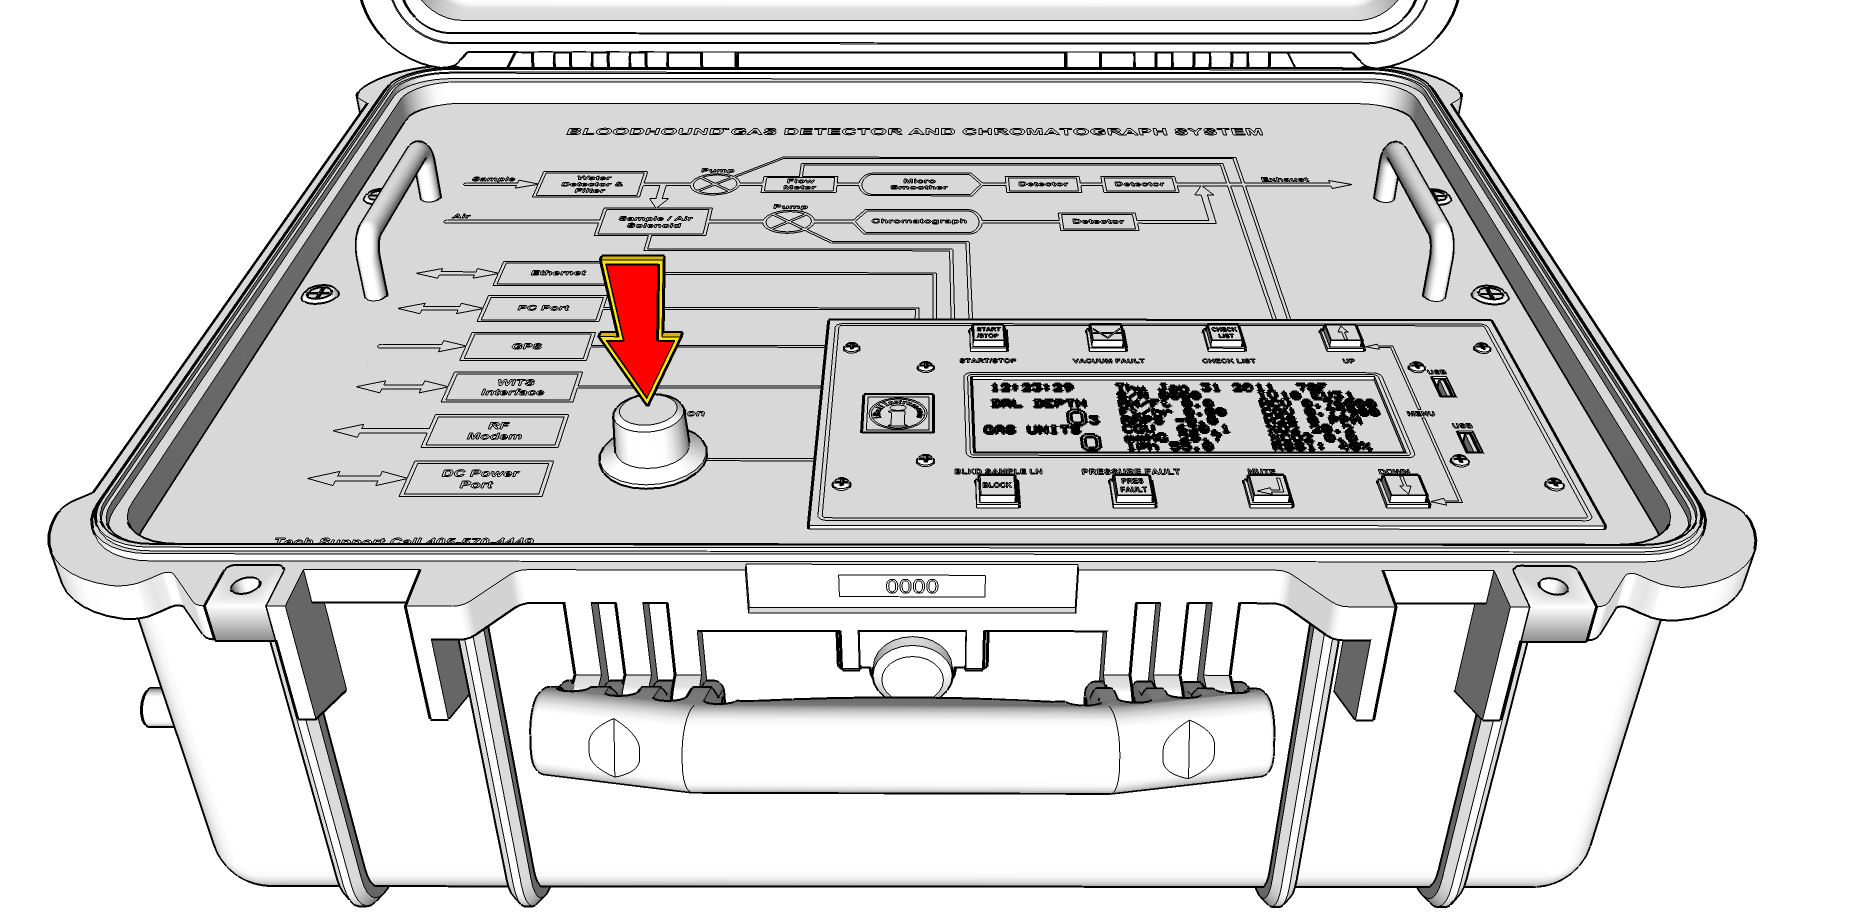
d) Turn the knob one click at a time until you see, “H2S ZERO”.
e) Press the “Enter/Mute” key on the face of the Bloodhound:
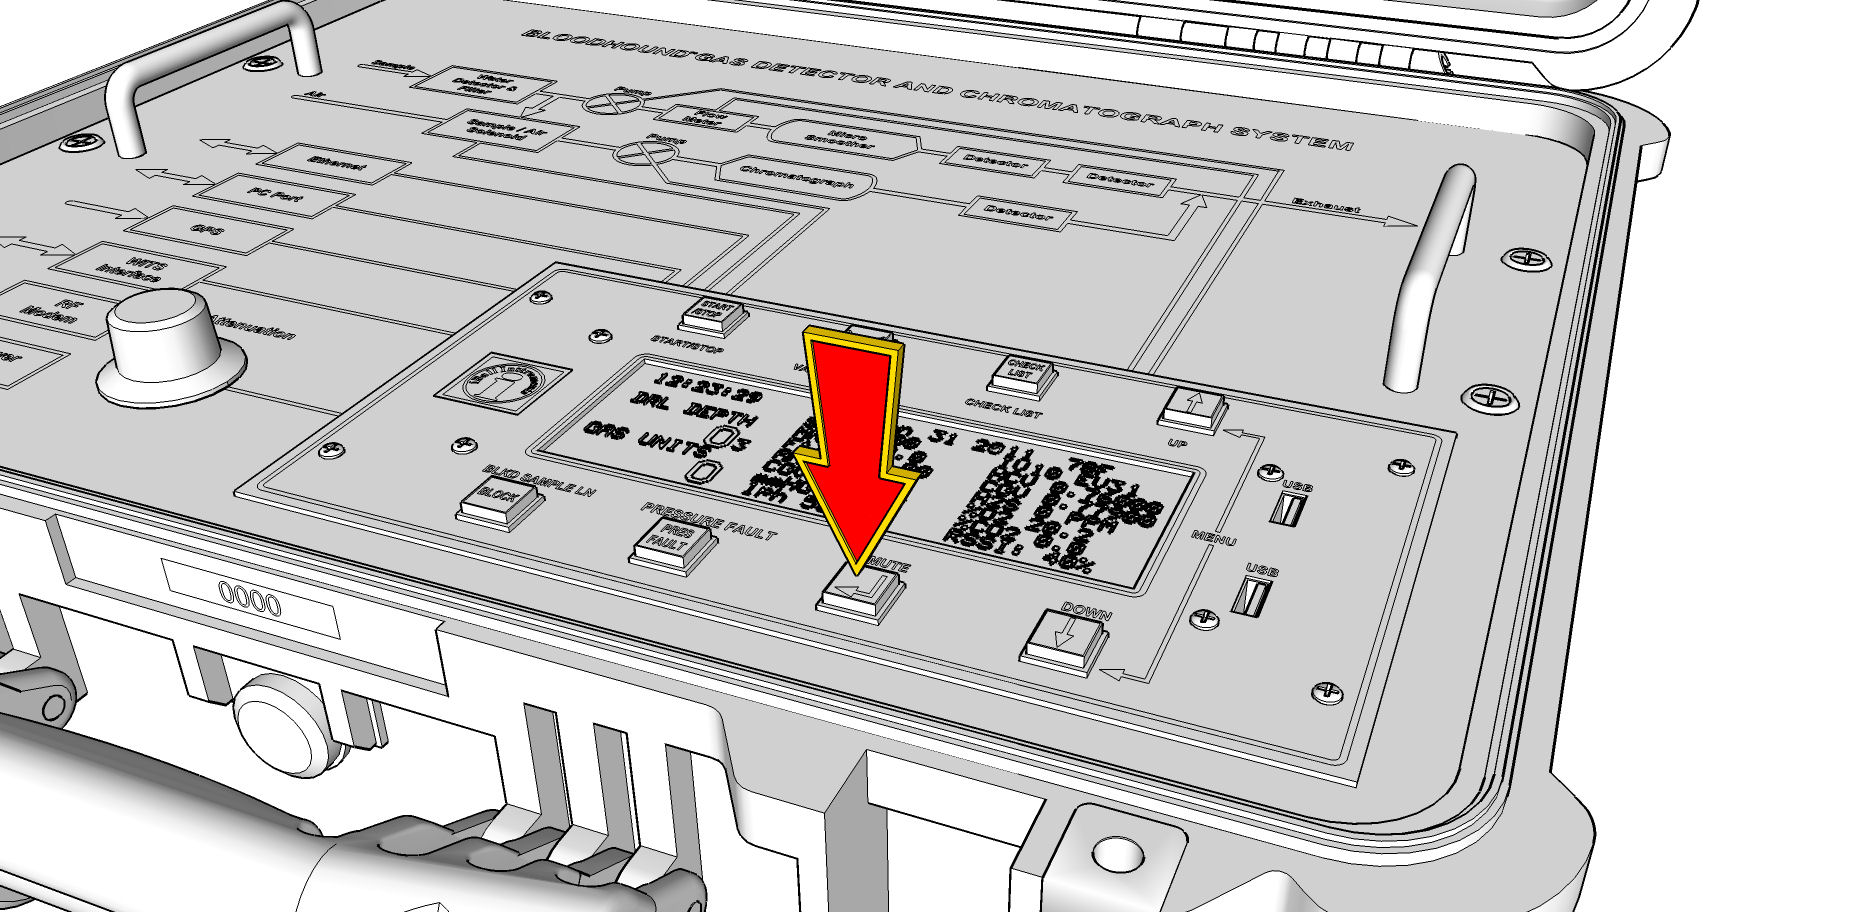
f) Turn the knob until you are reading (this is a recommendation – you may use your own number) of 5.00 PPM of H2S.
g) Press the “Enter/Mute” key again to set the zero point.
h) Once you have completed this, you may either exit (if necessary) by hitting the “Start/Stop” key, or waiting for the menu to exit.
i) Verify that the Bloodhound is reading H2S by looking at the face of the Bloodhound for the H2S value (which should show your zero set point), or by looking at the H2S value in the Real-Time Data screen of Gas Chart, on iBallRemote.com, or on the stand alone Real-time Data Viewer.
j) You may now reconnect your sample line. For all H2S values, be sure to subtract the zero set point you established in step “f” above.
3) If Applicable, Setup the WITS third-party H2S:
Third-party H2S is carried on WITS channel 1826. As long as your WITS system is
setup properly and is able to communicate with the Bloodhound, having it listen on
channel 1826 for third-party H2S will send the PPM of H2S that the Bloodhound is
reading to the WITS system.
4) Exporting LAS/XLS Files from Gas Chart:
When working with H2S, if the sensor is turned on, you will see the values for H2S as they were read in the appropriate column of the XLS/LAS file exported from iBall Instruments Gas Chart (it is a labeled column).
TROUBLESHOOTING:
If you have setup the bloodhound to measure H2S and do not see that value on the Real-Time Data View or in your WITS system, check the following:
1) Remember than whenever you reboot, or power-down/power-up the Bloodhound the H2S sensor is disabled by default if it was set to 1 (255 will persist through a reboot, but 1 is changed to 0). Check Register 41 and ensure that it is set to 1.
2) If you see H2S on the Bloodhound/Gas Chart, but not in your WITS system, try setting register 67 to 1 (this forces the Bloodhound to send all data without waiting for a request from the WITS system).
3) If you see H2S on the Bloodhound/Gas Chart, but not in your WITS system, ensure that the WITS system is listening for H2S on Channel 1825 (not 0141) and have your WITS system representative turn on that channel and assign it to H2S.
4) If you know you have H2S and are reading none, go into the knob menu, and re-zero the H2S.