PREREQUISITES:
1) You need a valid and working Internet connection. Please test this before proceeding.
NOTE: If you have just navigated to and are viewing this article, chances are you have a valid and working Internet connection.
2) You need to know the Serial Number (3 or 4 digits) of the Bloodhound Instrument that you have deployed.
3) You need an Adminsitrator-Level Username and Password for your Bloodhound Unit (the one you use to login to iBallRemote). If you do not have this setup, please contact Bloodhound Support.
4) You need to have the Real-Time Data Viewer installed. If you do not, go to This website and then download and install it. first.
HOW-TO:
1) To run the Real-Time Data Viewer, either double-click on the Desktop Shortcut called “iball_real_time_data” that was created when you installed the programs, or run it via the Windows Start Menu (Start–>All Programs–>iBall Instruments–>iBall Real Time Data Viewer).
2) In the upper-left part of the screen, type in the Serial Number of the Bloodhound Device where it asks for it.
3) Click on the “Connect to Server” button. Ensure this turns green – if it does not, re-check the serial number you entered and your Internet connection.
4) Click on the “More Data” button. Ensure that Yellow Text is scrolling by at regular intervals (about every 6 seconds or so).
5) Click on the “Two-way Inactive” button and type in your administrator user name and password, and click the “Send” button. If you entered it properly, the button should turn green and say “Two Way Active” and you should see a message in the Yellow Text area that says, “[TWO WAY]”
6) Click anywhere in the Yellow Scrolling Text area at the bottom-left of the screen, and type “Echo on”, and hit ENTER. You should see the words, “Echo on“, and a Carat symbol (“>“). This is another verification that your “TWO WAY” mode is working. NOTE: You will NOT see any text while you are typing other than the regular “number blocks” coming by once every 6 seconds or so – You will only see what you typed after you press ENTER.
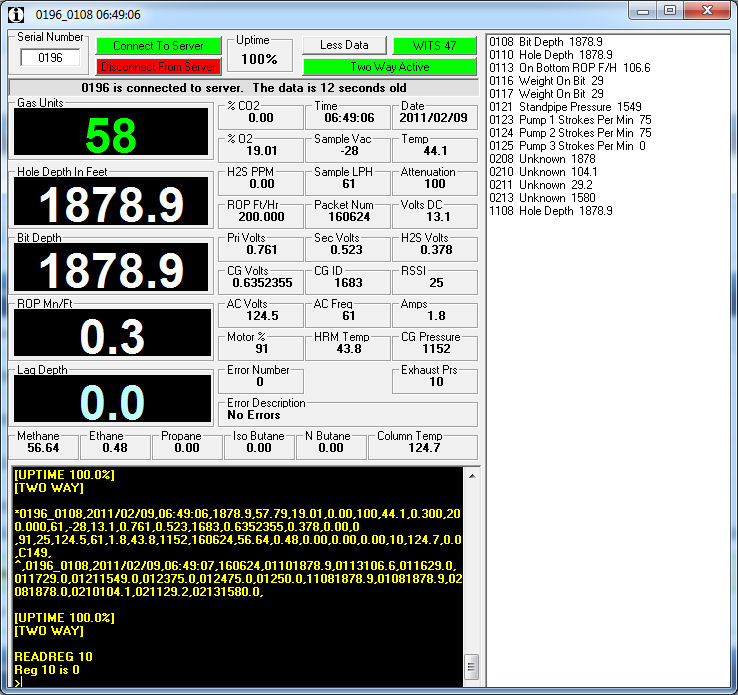
7) Usually, you want to check the value of a retister before you set it – this is done with the “READREG” command.
a) Type “READREG register_number” and press ENTER (without the quotes, and where register_number is the actual number of the register you want to check – for example “READREG 10” and press ENTER).
b) If you have performed this step correctly, you should see something like the screen shot below where the register value is shown back to you in the yellow text:
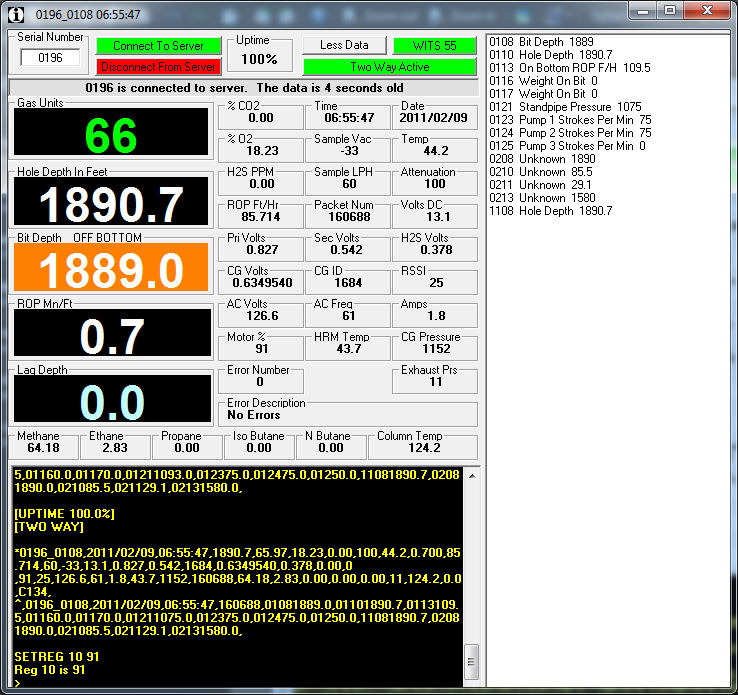
8) Now, to set a register, the procedure is very similar to step 7 above, except that the command is “SETREG” instead of “READREG“.
a) Type “SETREG register_number value” and press ENTER (without the quotes, and where register_number is the actual number of the register you want to set – for example “SETREG 10 91” and press ENTER).
b) If you have performed this step correctly, you should see something like the screen shot below where the register value is shown back to you in the yellow text as having been set:
Congratulations! You have read and set a register on the Bloodhound remotely!