How to (Locally) Set a New Job Number on the Bloodhound
This article explains how to locally set a new Job Number on the Bloodhound using the on-board menuing system.
PREREQUISITES:
1) You need to be on-site with the Bloodhound in your immediate presence to accomplish this.
2) Know why and when to set a Job Number. You have to do it only when you’ve made a large up-hole move, such as:
a) Starting a new well.
b) Starting a new side-track.
c) A large up-hole adjustment.
The reason for this is that starting a new Job Number on the Bloodhound tells it to start a completely new database using depth as the primary key. In the process, it also does the following:
a) It initializes and starts a new database and chart on iBallRemote.com
b) It erases the backup of the last Job Number’s data on the Bloodhound, makes one (1) copy of the current database, and puts it in the single backup location on the Bloodhound, and it creates an entirely new database that will now be started with the new Job Number.
BOTTOM LINE: Know when to start a new job number – if you have any questions, contact support.
HOW-TO:
Here’s the quickest way to do it on-site at the Bloodhound Console itself:
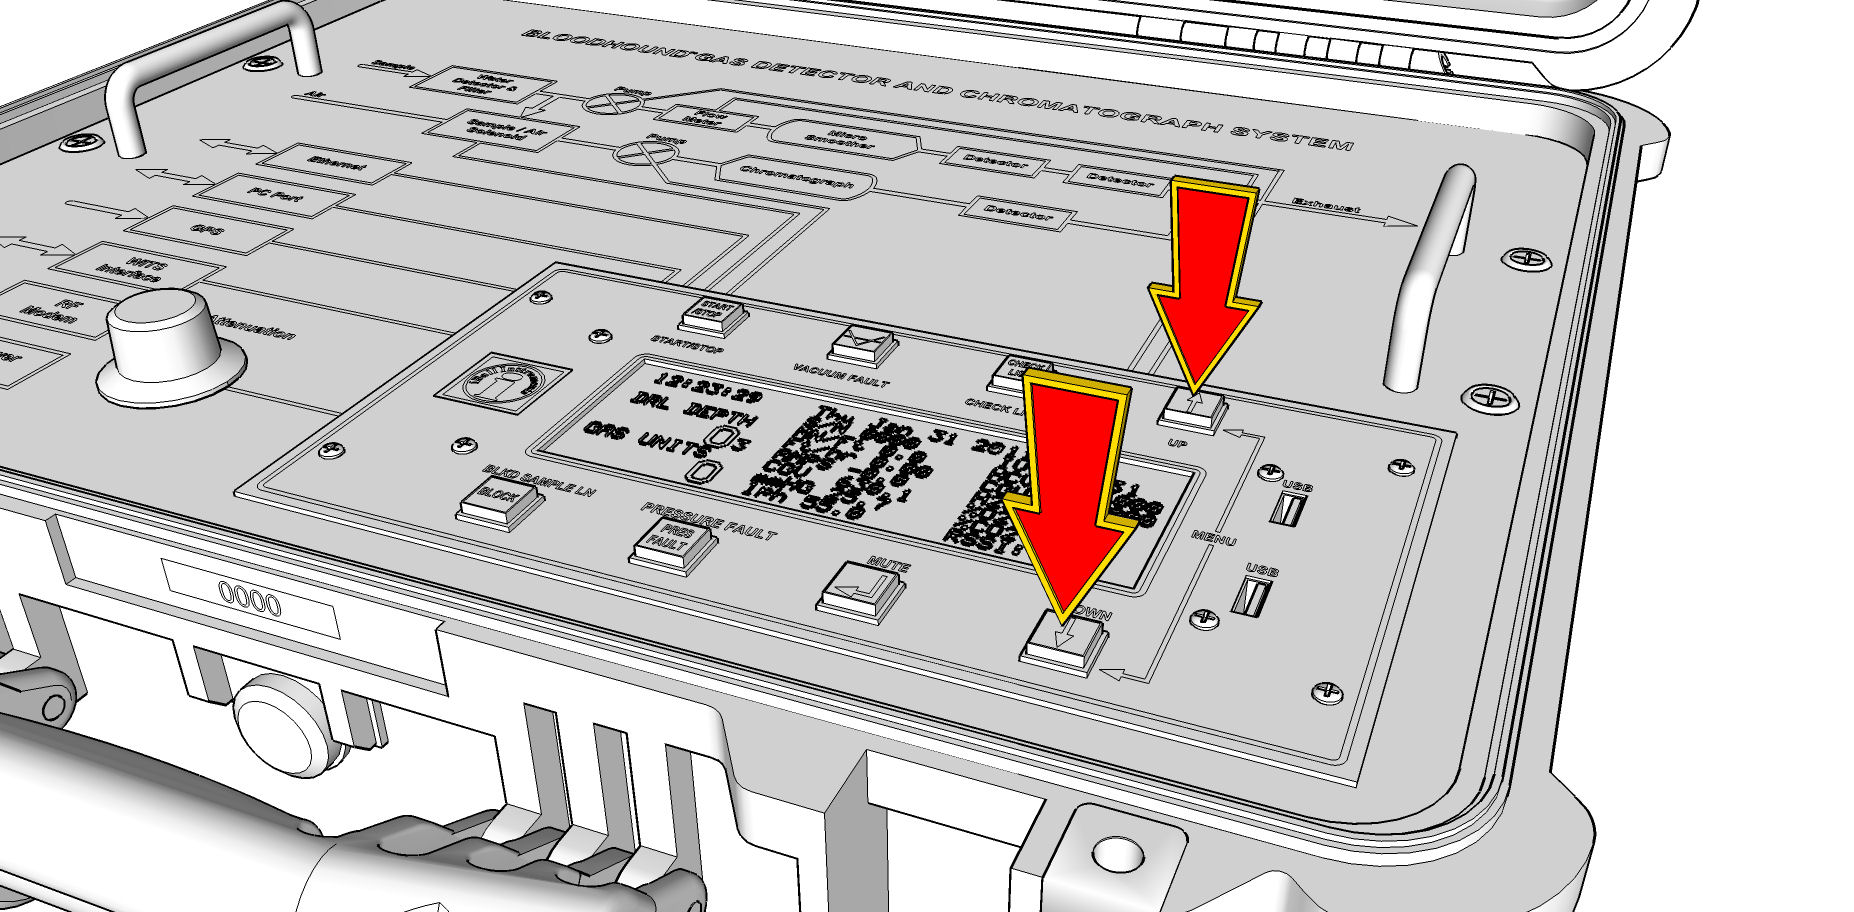
1) Press the Up and Down Arrow buttons on the right hand ends of the rows at the same time to bring up a menu.

2) You may now use the Arrows to go to the “SET JOB NUMBER” menu option.
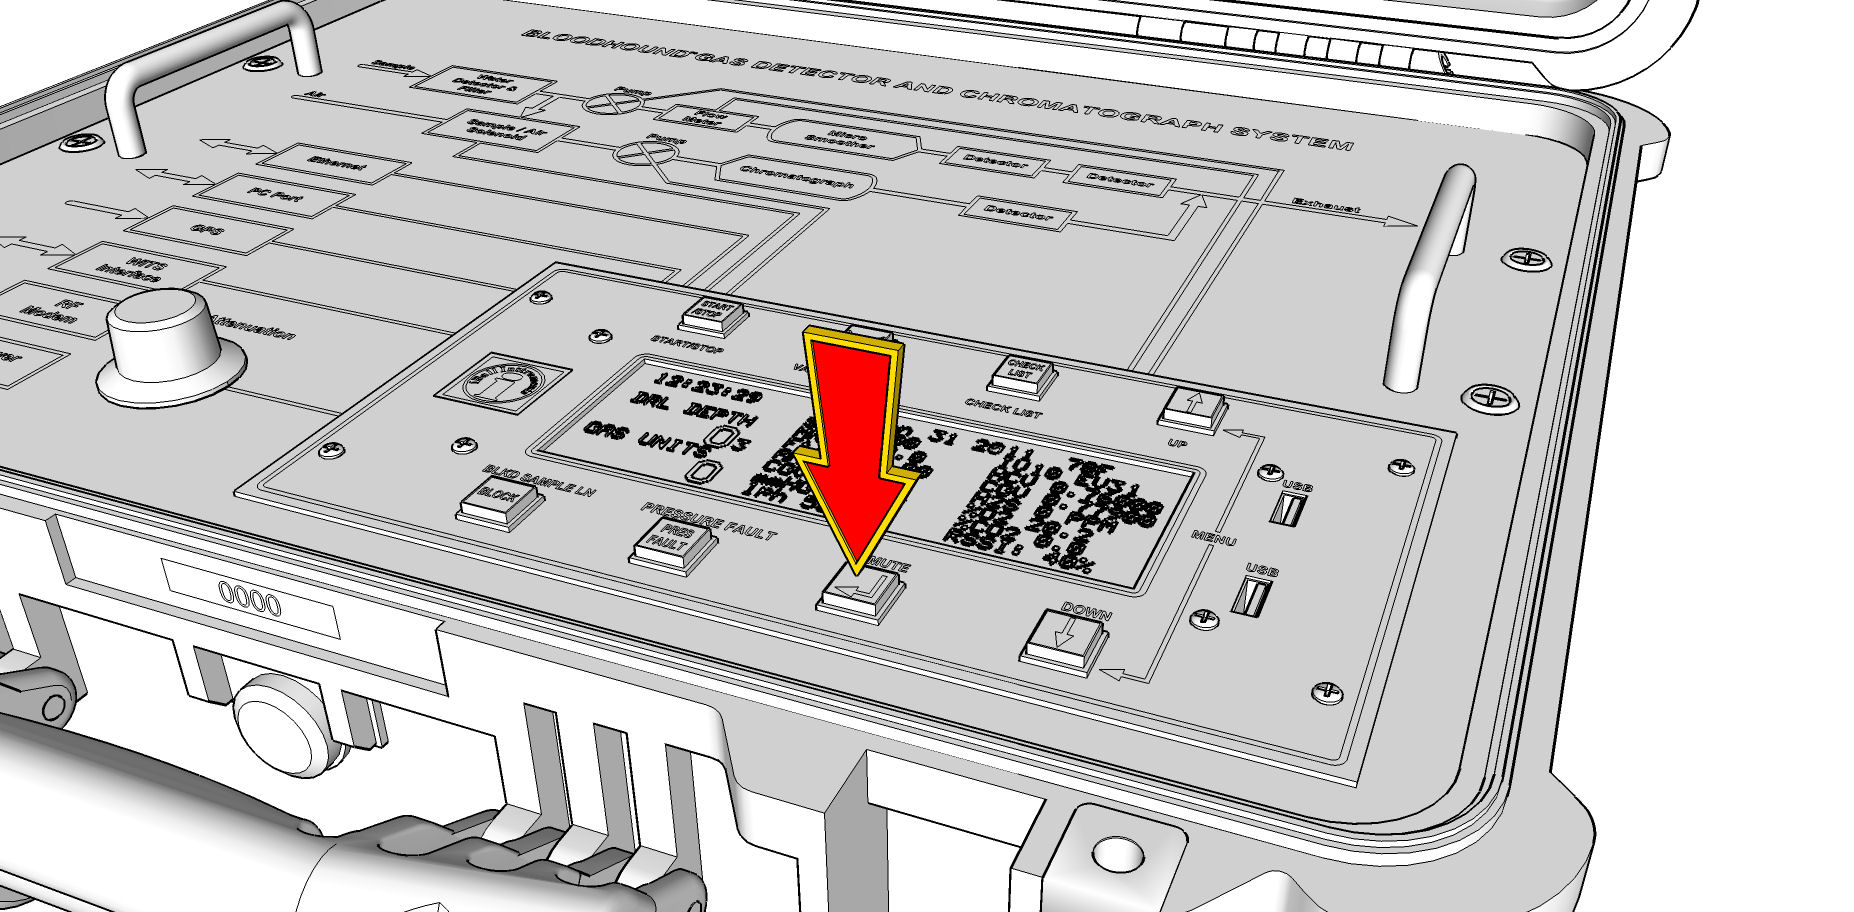
3) Use the “Enter/Mute” button to select this menu item.

4) Increment the Job Number by 1 (don’t jump around or it may cause you problems on a later well, so we always recommend incrementing by 1).
5) After this is done, you may find it wise to start a new Database if you’re running Gas Chart. This will not erase old data, but starts you off fresh with the new job number so that old well data is not mixing with your current well data and messing up your exports.