This article coveres one of the two methods of connecting your Bloodhound to the Internet. Specifically, it addresses how to use the on-board Ethernet (network) card to make this connection.
PREREQUISITES/ASSUMPTIONS:
1) You need to be on-site with the Bloodhound.
2) You will need a working on-site Local-Area-Network (LAN), including a network router capable of allocating and dishing out IP Addresses. This router will need to have at least one (1) open network port.
3) If you are trying to connect the Bloodhound to the Internet, the router mentioned above must be part of a network that has direct access to the network. This article assumes that you have a working LAN with access to the Internet.
4) In order to connect to the Internet, the network must not have any firewalls that block the ports associated with the Bloodhound fleet. For more information on what ports need to be open for the Bloodhound and its software to function, find the article entitled, “What IP Addresses and Ports need to be Opened on my Firewall?” in the section at the end of this article called, “OTHER ARTICLES OF INTEREST”.
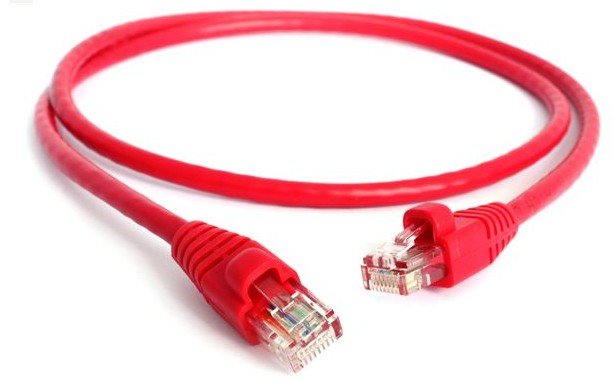
5) You will need a CAT-5 or CAT-6 network cable long enough to make the run between the Bloodhound and the network router. This cable must have RJ-45 network connectors on the ends. An example of one of these cables is shown in the figure below:

HOW-TO:
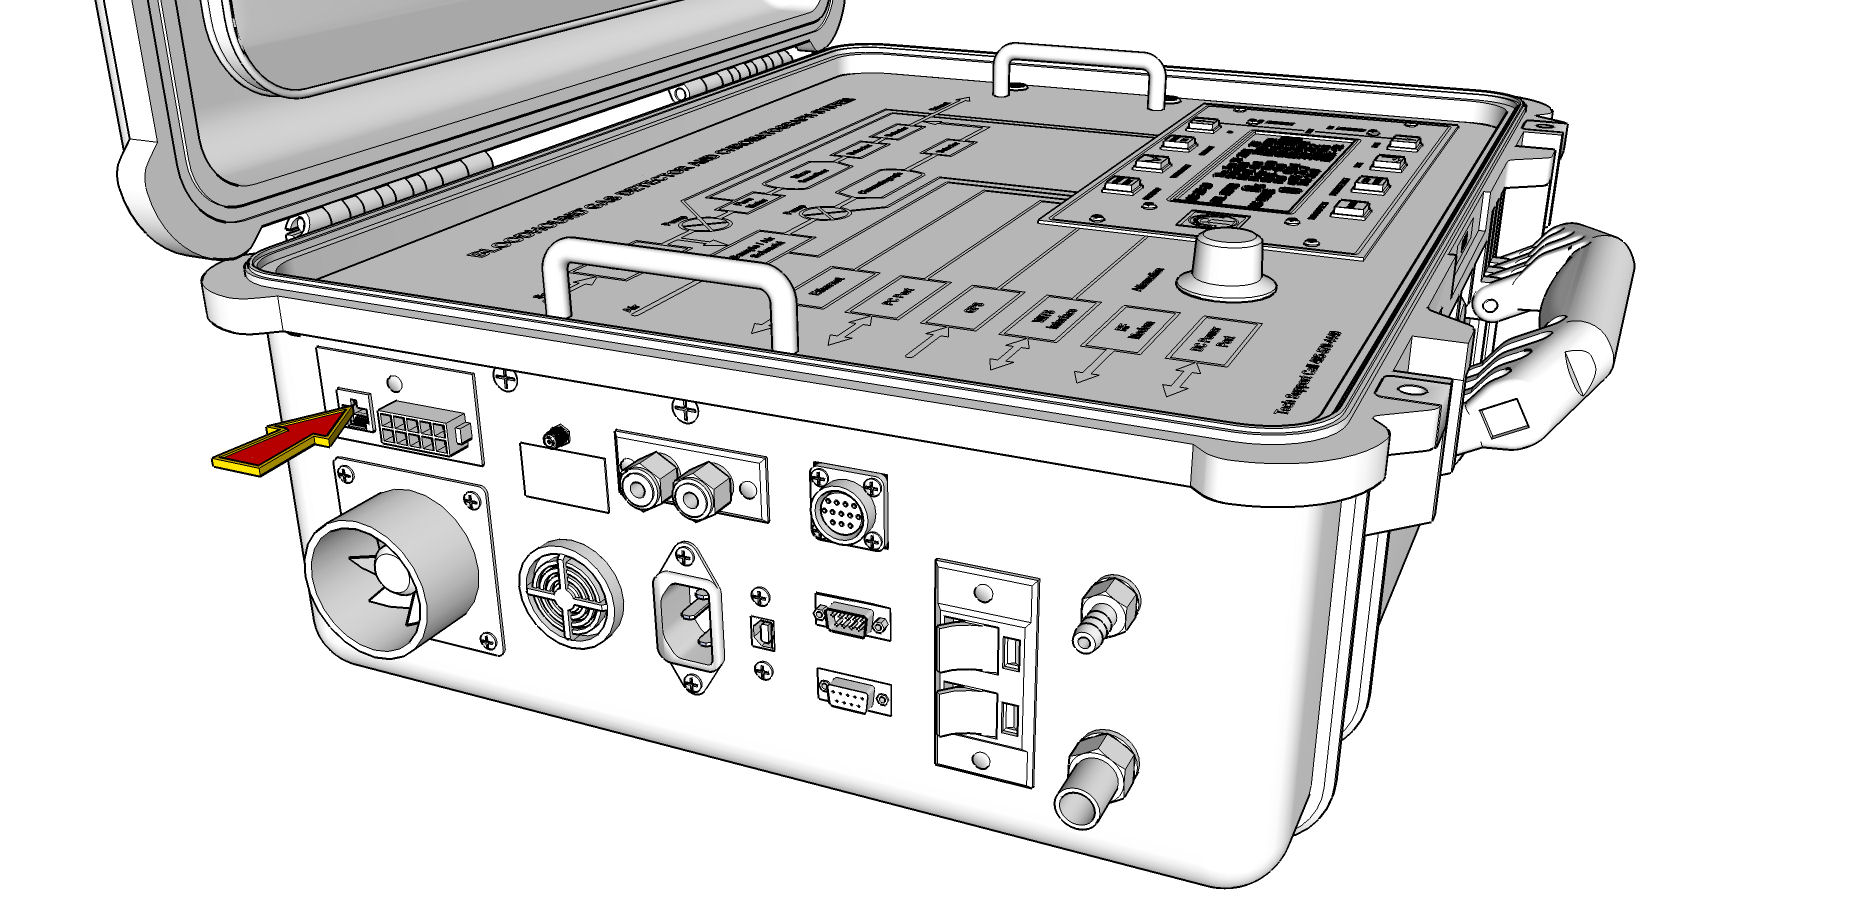
1) CONNECT THE NETWORK CABLE TO THE BLOODHOUND: Find the RJ-45 network connection on the Bloodhound (identified in the figure below) and carefully connect one end of an RJ-45 network cable to this port:

2) CONNECT THE CABLE TO THE ROUTER: Carefully plug the other end of the RJ-45 network cable into the network router.
3) POWER THE BLOODHOUND ON: If the Bloodhound is not powered on, power it on now, and wait a few minutes for it to fully boot up.
4) POWER THE NETWORK ROUTER ON: If it is not already powered on, turn on your network router.
5) VERIFY CONNECTIVITY: There are two valuable indicators that the network is connected:
a) HARDWARE CONNECTIVITY: Look carefully at where you plugged the RJ-45 cable into your network router. Most network routers have lights at the port. If you see lights come on when you plug in the Bloodhound, and they are “flashing” intermittently (as if to indicate data flow) then the most basic hardware connection between your Bloodhound and the network router is working.
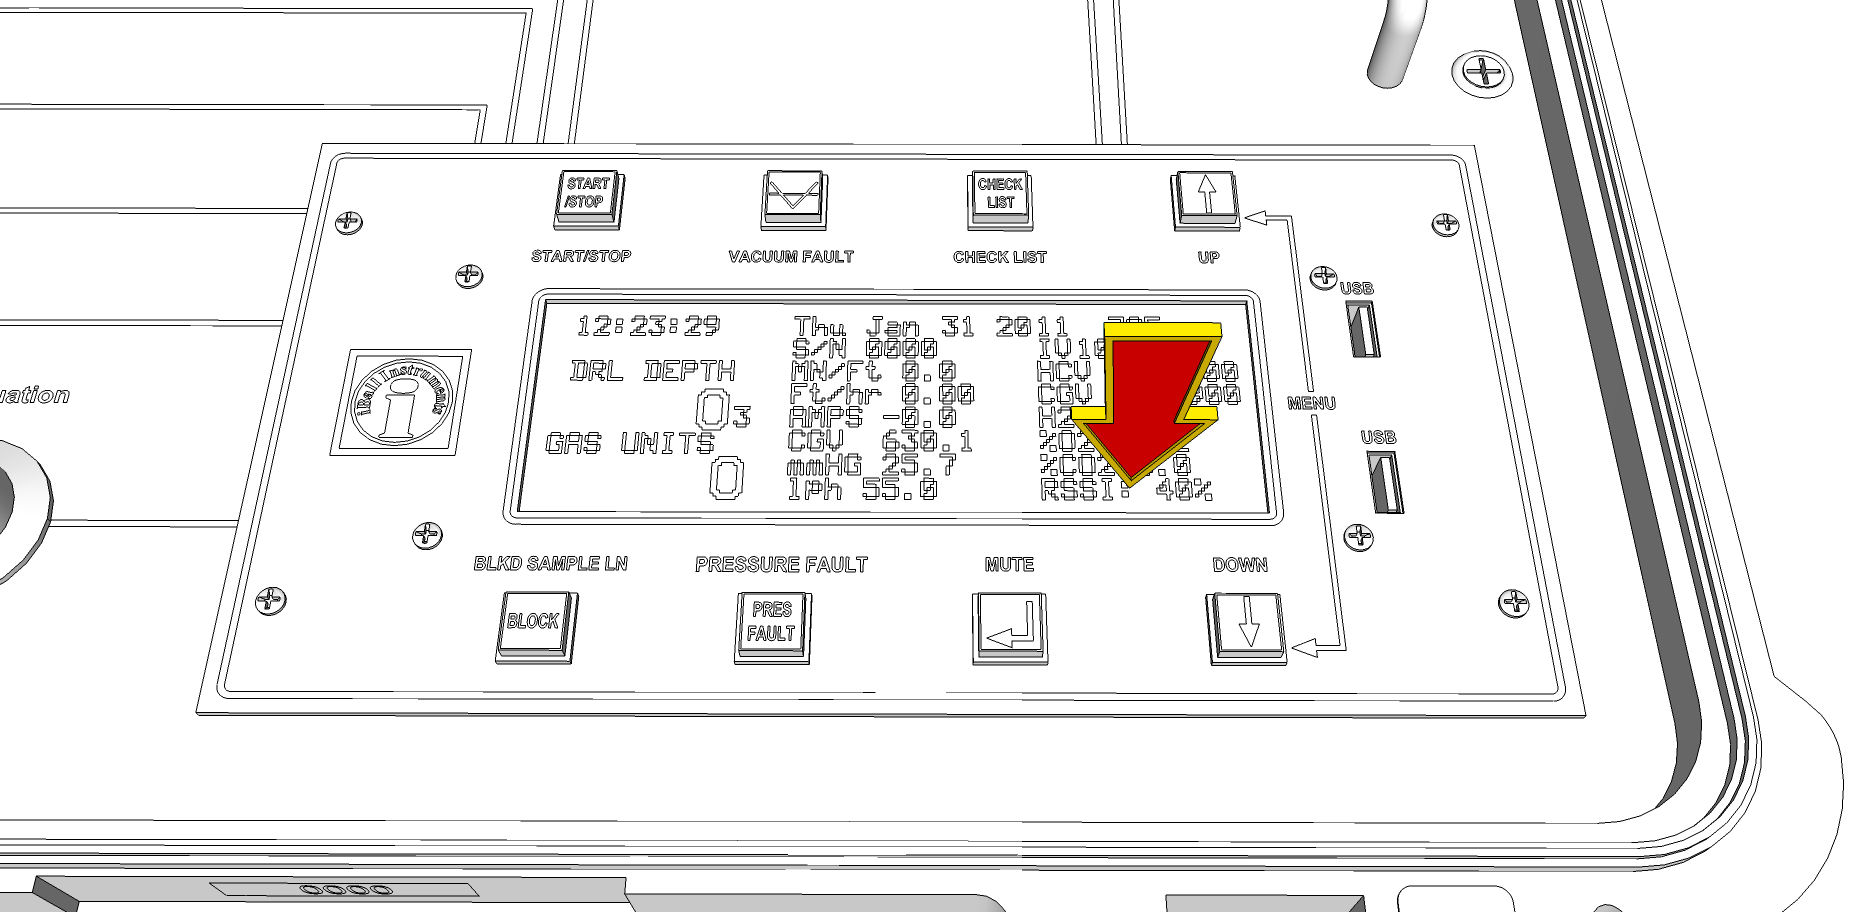
b) FIND THE NETWORK ADDRESS FIELD: If you look at the face of the Bloodhound and find the LCD, note the bottom-right “field” on the LCD is “rotating” through a number of values (this field’s location is identified in the figure below):

c) CHECK THE NETWORK ADDRESS: Wait for the “Network Address” value to appear. When the Bloodhound is not connected via a network connection, this address shows as, “0.0.0.0:23”. When it is connected to a Local-Area-Network (LAN) and has allocated a network address, it *might* show something like, “192.168.1.3”. If you see the former, wait a few minutes for everything to boot up and have time to connect. If you see the latter, the Bloodhound is connected to the network.
d) WAIT FOR connection: You may need to wait several minutes for the Bloodhound to make a connection to the Internet. If you have a good network address have waited for more than 10 minutes or so, consult the article entitled, “How to Troubleshoot a Network (Ethernet) connection Problems” in the section called “OTHER ARTICLES OF INTEREST” at the end of this article.
Congratulations! You have connected your Bloodhound to the Internet via Ethernet!