This article covers the process of connecting your computer to the Bloodhound using the local USB connection. This is a valuable connection for the on-site computer in that it is automatically assumed to be an “Administrator-Level” connection. The logic is that since the logger is on-site and has access to the Bloodhound through the keys on the face of the unit, there is no point in denying the same functionality over the USB interface. This is critical in that Gas Chart is the mechanism by which one “picks peaks” on the Bloodhound’s chromatograph, and is therefore essential for the on-site logger.
PRECONDITIONS/PREPERATION:
1) You need to be on-site with the Bloodhound.
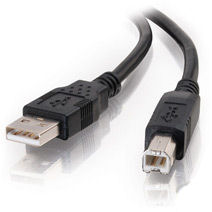
2) You will need a standard USB Printer Cable to connect your computer to the Bloodhound – these can be found at nearly any electronics store. Anywhere that sells computer printers will have them. We recommend getting two (2) of these to have on hand in case you need an extra for troubleshooting at a later time. The ends of the USB Printer cable should look like this:
4) Your computer must have a free USB port available. It is not recommended to use an unpowered USB hub in this case. A powered USB hub is ok, but it does add additional connections/potential points of failure, and is not advised as much as using a direct USB port on your computer.
3) It would be valuable to have an Internet connection, although not required.
STEPS:
1) Start by making sure you do *not* have the USB cable connected at this time. If it is please unplug it from the Bloodhound or your on-site computer.
2) Retrieveing the latest USB Drivers from the iBall Instruments Web Site. NOTE: If you do NOT have an Internet connection, skip to step three (3) below:
a) Open your web browser (EX: Internet Explorer) and go to the web address:
https://iballinst.com/download You should see something similar to the following screen:
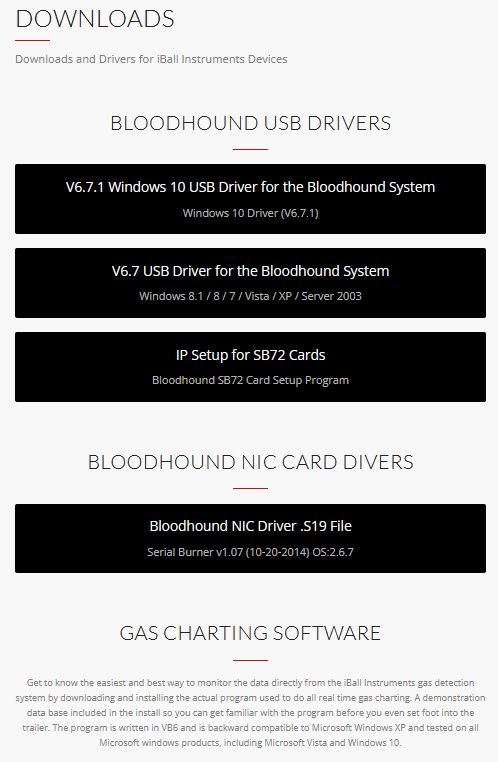
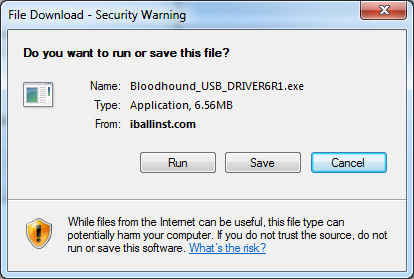
b) Click on the link that reads ” USB Driver for the Bloodhound System“. Depending on your version of Windows, you may see something similar to the screen following this section. It is recommended that rather than running this application from this location, that you save the USB Driver installation to a location where you can easily access it later (such as your desktop).
OPTIONAL: You may also download and save the latest version of Gas Chart by clicking on the link that reads “iBall Instruments Gas Charting – software Download Version…“
c) Skip to step four (4) below. NOTE: You may read Step three (3) for information only at this point if you’d like – it covers getting the drivers from the USB Flash drive plugged into the face of the Bloodhound – since you downloaded the latest version from the Internet, this is a moot point.
3) Retreiving the USB Drivers from the Bloodhound’s USB Flash Drive:
a) Look at the face of the Bloodhound. You will notice that plugged into one of the USB ports to the right of the LCD display there is a USB Flash Drive. Take note of exactly which port it is plugged into, and what direction it is facing (taking a photo or even making a mark on it are really good ideas).
b) If your Bloodhound is actively logging a well, you will want to complete steps (c) and (d) very quickly, or (ideally) during a connection or a trip when active drilling data is not being collected. This is because the USB Flash Drive is actually one of the Bloodhound’s redundant storage devices, and contains an ORIGINAL copy of the Bloodhound’s well data – so you don’t want to have the USB Flash Drive removed from the Bloodhound very long, or during drilling times.
NOTE: The Bloodhound does *not* have to be connected to your computer to be logging data, so you can safely wait for a connection to complete the next steps.
c) Remove the USB Flash Drive, and plug it into a spare USB port on your computer.
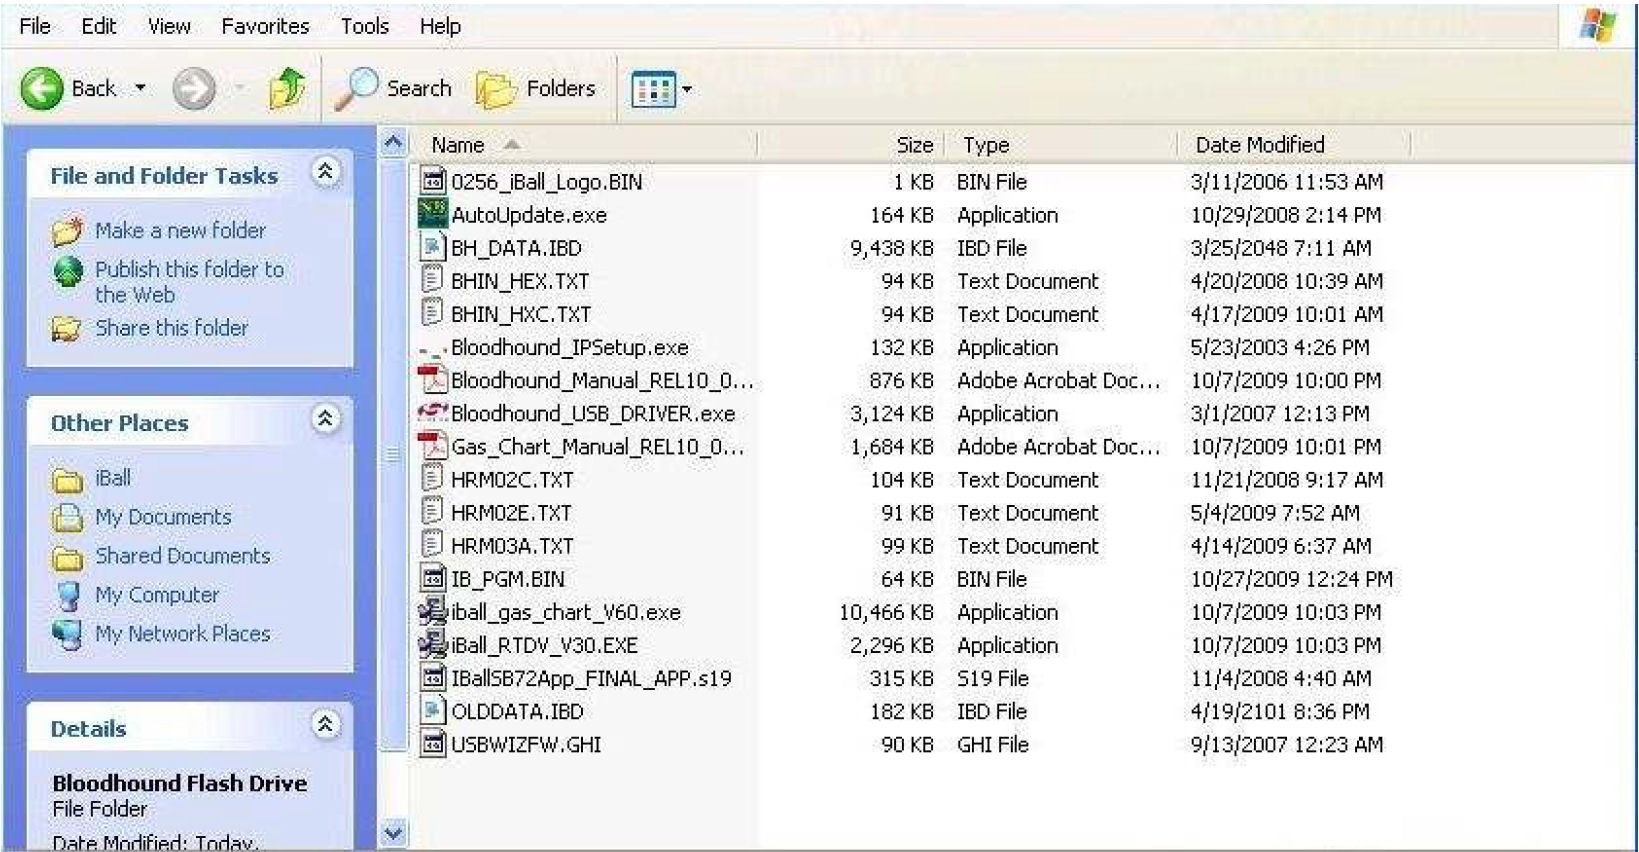
d) Depending on your version of Windows and options, it may automatically open, or you may be forced to open “My Computer” and then open it from there…it will be labeled something along the lines of “Removable Storage” if it properly mounted. Double-click the icon for the Flash Drive to open it if necessary. You will see the contents of the Flash Drive – they should look something like this:
e) Copy the USB Drivers to your computer:
i) Right-Click on the file labeled something like “Bloodhound_USB_DRIVER.exe”, and choose “copy”.
ii) Find a location on your computer where you can easily locate the file (such as your desktop).
iii) Right-click in this folder or location, and choose “paste”, and the file should be copied from this location to the new folder.
f) OPTIONAL: You may also want to copy the file named something similar to, “iball_gas_chart_vxx.exe”, as this is the Gas Chart Software installation and is the next logical step.
g) Remove the USB Flash Drive from your computer, and plug it back into the Bloodhound exactly as you found it before you originally removed it from the Bloodhound.
5) Install the new drivers:
a) Locate the driver you either downloaded, or copied from the USB Flash Drive.
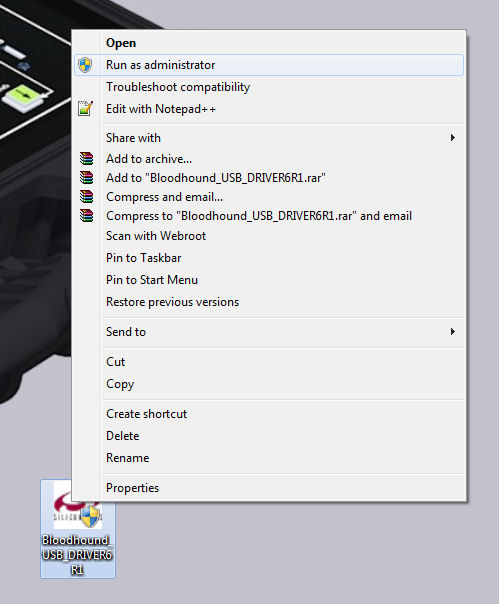
b) If you have Windows Vista or 7, right-Click on the install set for the Silicon Labs USB drivers, and choose “Run as Administrator”
c) If you’re running Windows XP or earlier, just double-click the executable.
d) Go through the installation process, choosing all of the defaults.
e) Let the installation process complete.
6) Test the installation by using the Windows Device Manager:
a) Open the Device Manager (right-click “Computer” or “My Computer”, and choose Properties–>Hardware–>Device Manager).
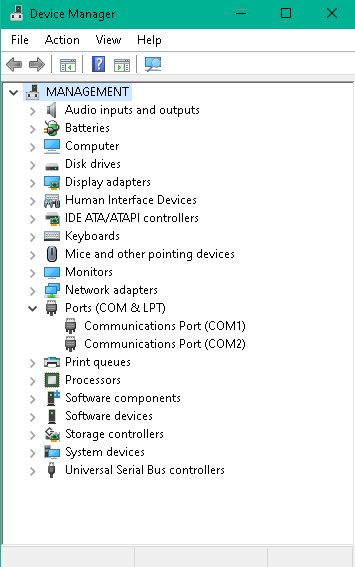
b) Open up the part of the tree that says, “PORTS” (if it’s there – if not, just scroll down to where PORTS will be alphabetically). This example shows no “PORTS” section:
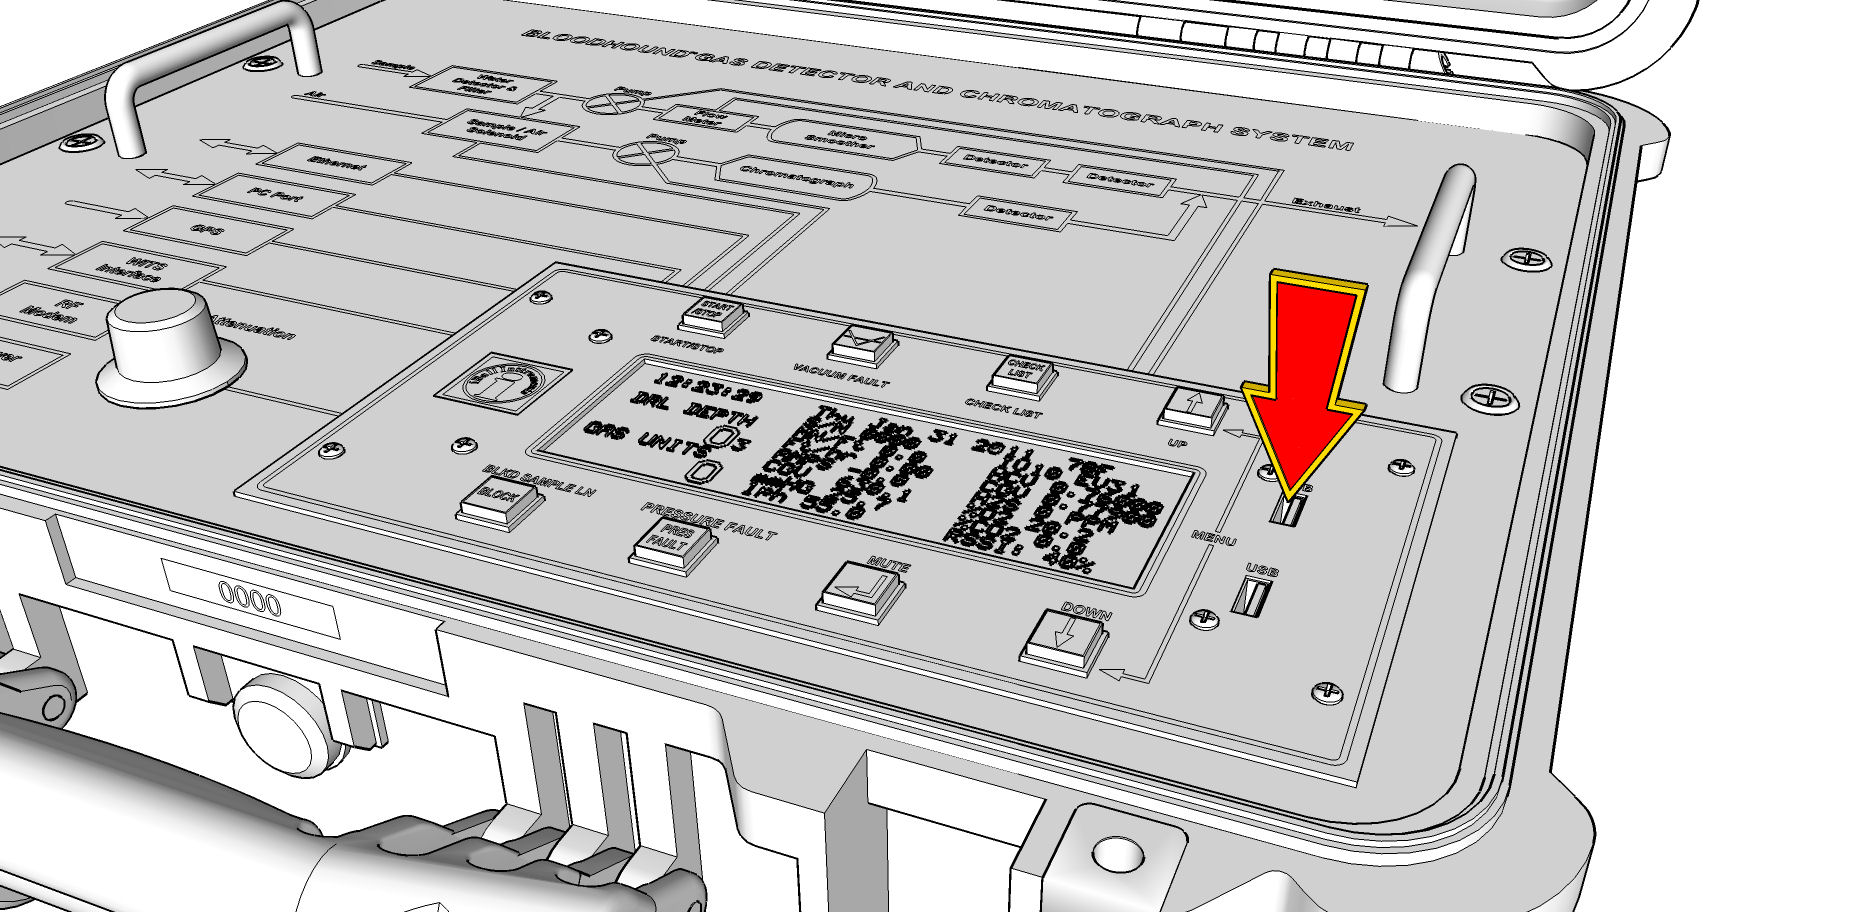
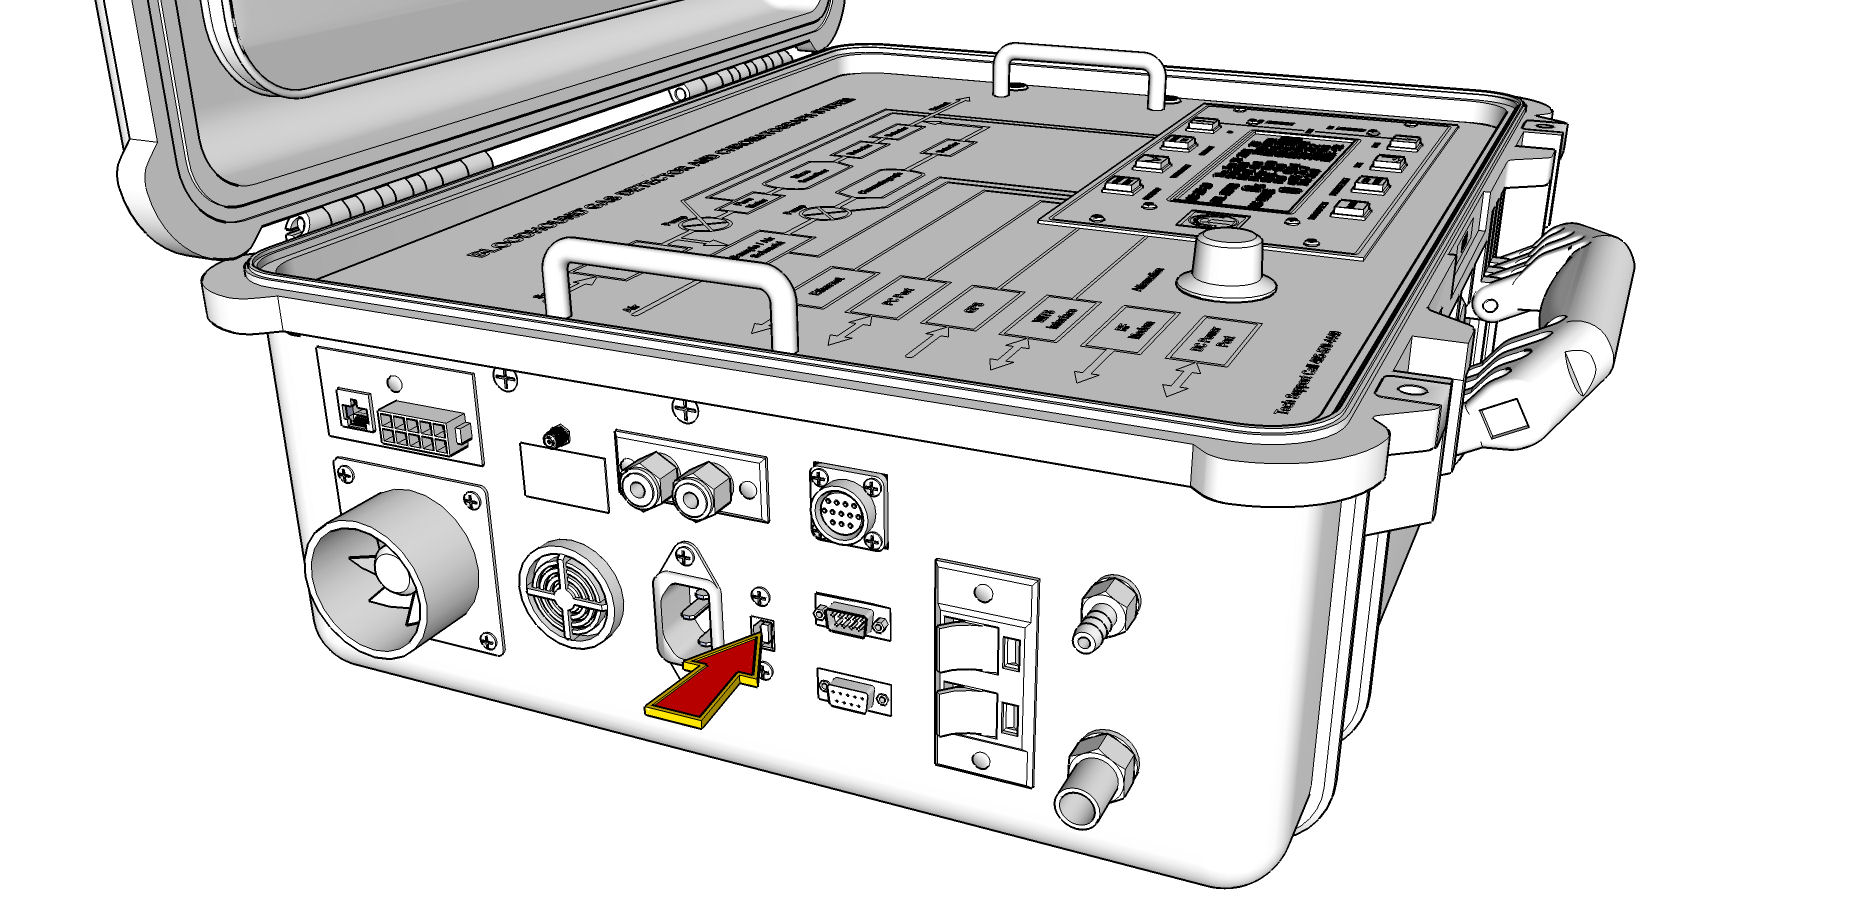
c) Now it is time to plug in the Bloodhound USB cable and wait between a few seconds and a minute or so for the port to be allocated and the drivers to be loaded. On the Bloodhound, this cable should be plugged into the following port on the Bloodhound:
d) Verify that a COM port is created in the “PORTS” section when you plug in the cable, and that it dissappears when you unplug the cable (it shows up under the “PORTS” section in the aforementioned tree.)
e) If you have any problems, consult the “OTHER ARTICLES OF INTEREST” section below for links to other articles that are related to troubleshooting various aspects of this connection.
Congratulations! You have installed the USB Drivers on the Bloodhound!