Because the Bloodhound operates on a relative gas presence principal, it is possible for the readings on the device to show the presence of gas at a flat rate when there is none. When this condition occurs, a simple re-calibration or “re-zeroing” of the Bloodhound device is in order. However, there are times when the person on site doesn’t know how to do this, so a remote process called “AUTOZERO” can be used.
PREREQUISITES:
To determine if your Bloodhound device requires re-zeroing, identify if the following conditions are present:
1) Determine whether the Bloodhound actually needs to be re-zero’d:
a) Are you getting a relatively flat line of gas reading? For example, your Bloodhound may be “zero’d” to 100 units, so the gas line would be a flat 100 units.
b) Pull the sample line, and check the following:
i) Does the Gas reading go to your previously set “zero point”? If yes, the bloodhound probably does NOT need to be re-zeroed.
ii) If the Bloodhound does not go to the previous zero point, or goes to a flat out zero (0.0 units), then the Bloodhound most likely needs to be re-zeroed.
2) Someone (not necessarily the logger, just anyone who can pull the inlet line before the remote zero command (AUTOZERO) is issued and who can replace it when finished) must be present on-site with the Bloodhound.
3) You need a valid and working Internet connection. Please test this before proceeding.
NOTE: If you have just navigated to and are viewing this article, chances are you have
a valid and working Internet connection.
4) You need to know the Serial Number (3 or 4 digits) of the Bloodhound Instrument that you have deployed.
5) You need an Adminsitrator-Level Username and Password for your Bloodhound Unit (the one you use to login to iBallRemote). If you do not have this setup, please contact Bloodhound
Support at support@iballinst.com
6) You need to have the Real-Time Data Viewer installed. If you do not, go to https://iballinst.com/download and load it.
HOW TO:
To accomplish re-zeroing gas reading for your Bloodhound Instrument using the
AUTOZERO function, follow these steps:
1) Get setup with iBall Stand Alond Real-Time Data Viewer (RTDV) and prepare to execute
the AUTOZERO command:
a) To run the Real-Time Data Viewer, either double-click on the Desktop Shortcut called
“iball_real_time_data” that was created when you installed the programs, or run it via the
Windows Start Menu (Start–>All Programs–>iBall Instruments–>iBall Real Time Data Viewer).
You should see the following screen after you run the application:
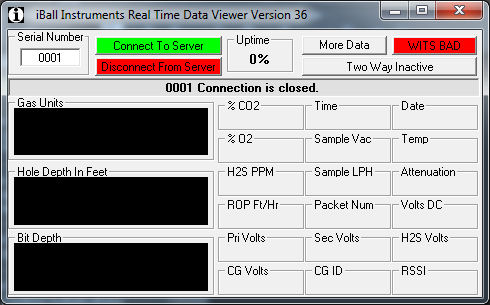
b) In the upper-left part of the screen, type in the Serial Number of the Bloodhound Device
where it asks for it.
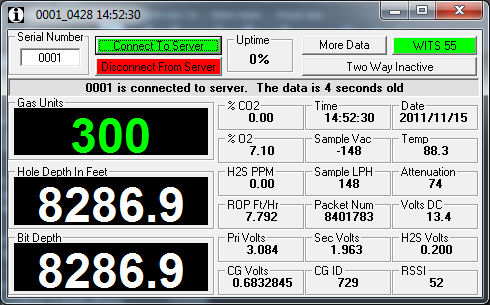
c) Click on the “Connect to Server” button. You should see Gas Units and Depth data come up
in a few seconds if the connection is valid. See the following example:
d) Click on the “More Data” button. Ensure that Yellow Text is scrolling by at regular
intervals (about every 6 seconds or so).
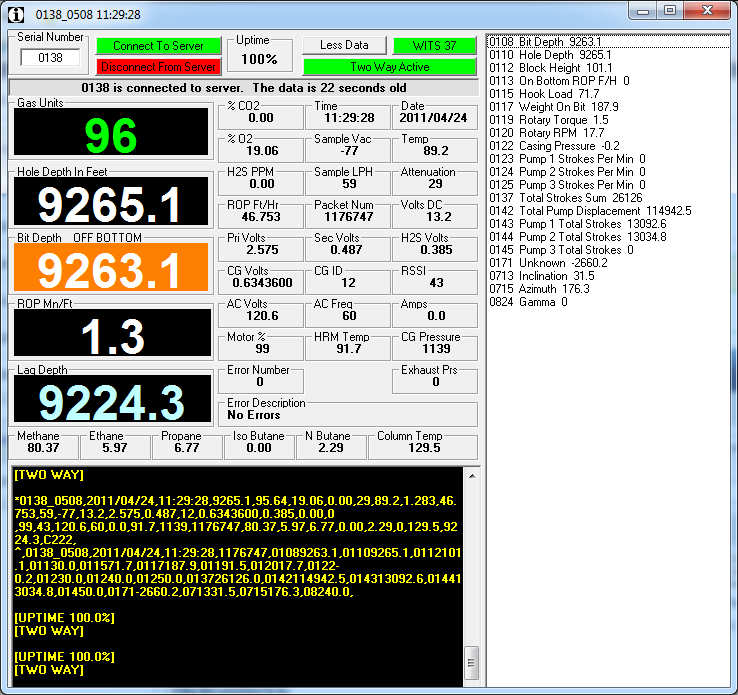
e) Click on the “Two-way Inactive” button and type in your administrator user name and
password, and click the “Send” button. If you entered it properly, the button should
turn green and say “Two Way Active” and you should see a message in the Yellow Text
area that says, “[TWO WAY]“
2) Prepare the Bloodhound to be Zero’d:
a) Remove the sample line from the sample line inlet on the Bloodhound:
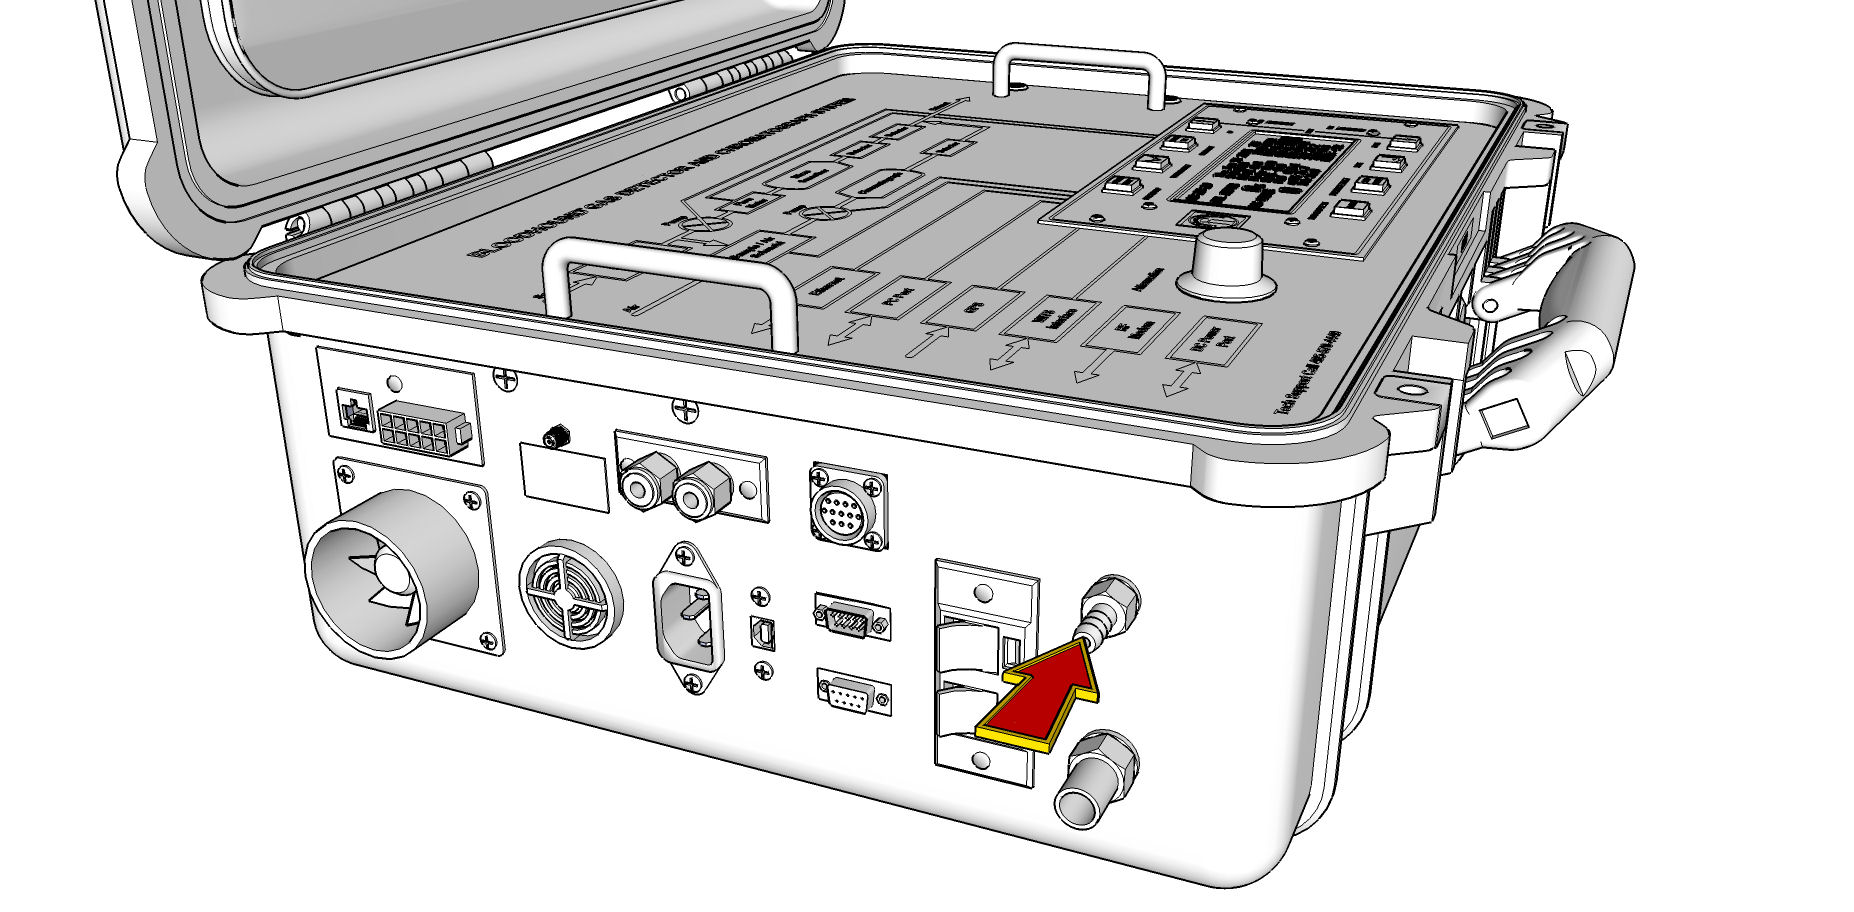
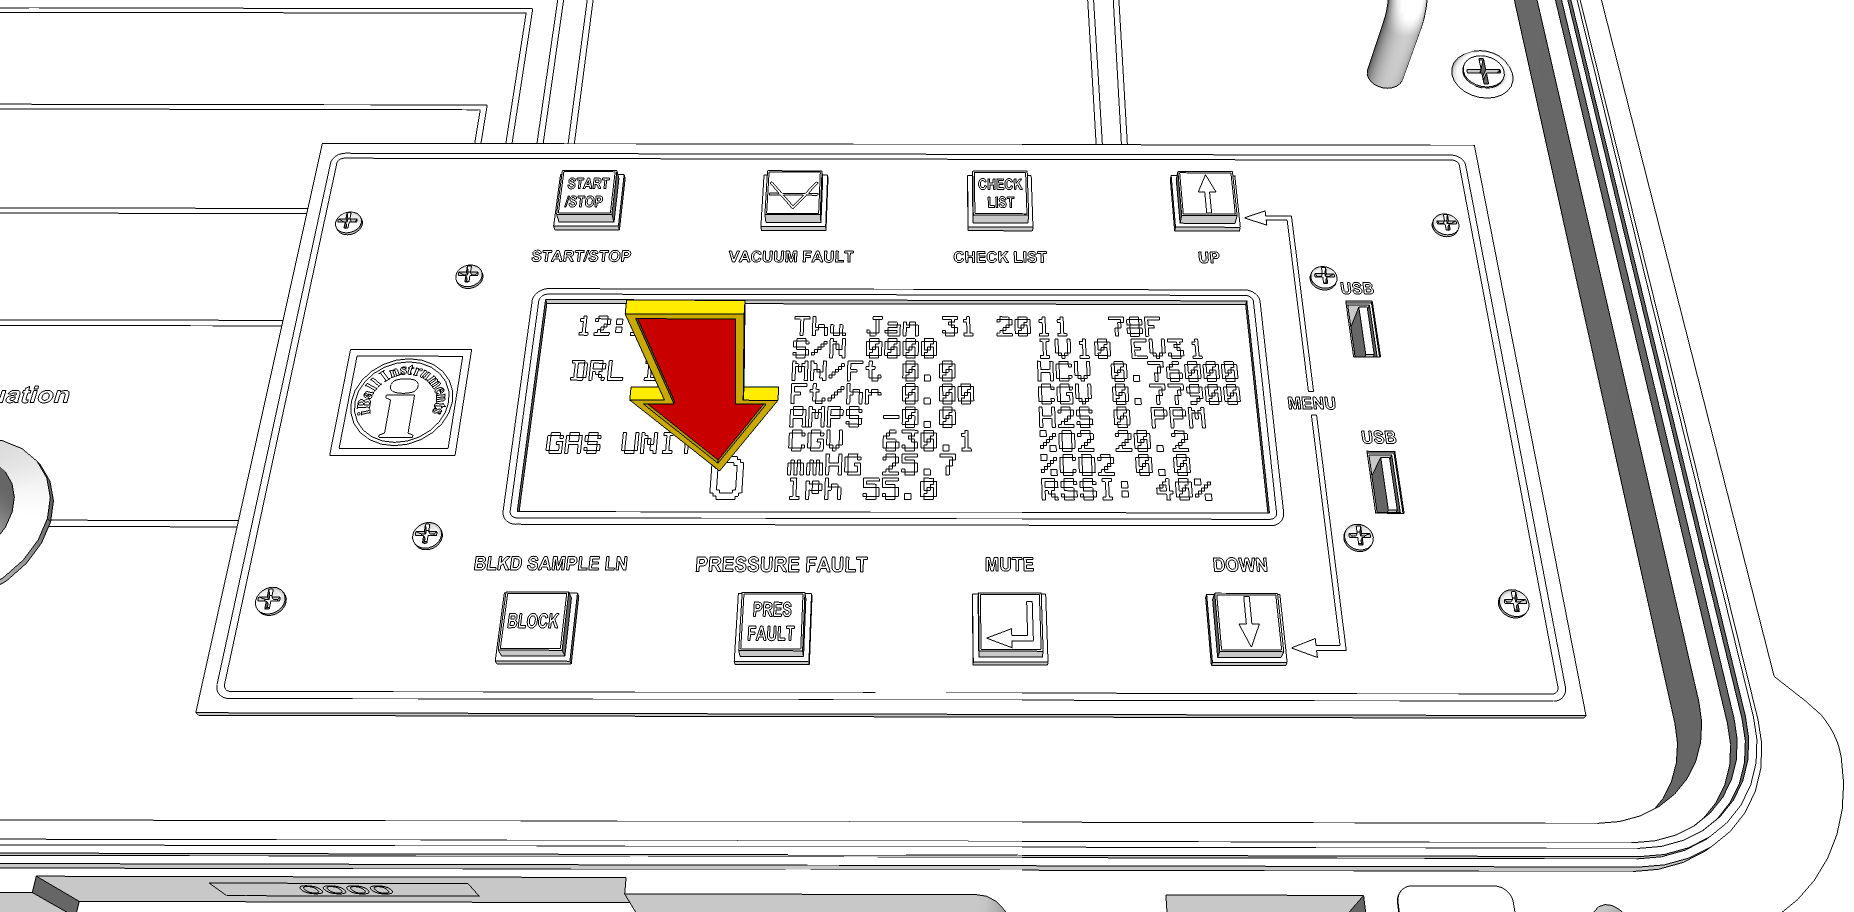
b) Watch the total gas reading on the bloodhound’s LCD and/or the Stand Alone Real-Time Data Viewer (RTDV) application and wait for the gas to settle out to whatever its current “zero point” is. This may take anywhere from a few seconds, to a couple of minutes or so. Once it stabilizes, move on to the next step below. NOTE: The LCD will be more accurate and responsive in this case.
3) Execute the AUTOZERO function on the Bloodhound using RTDV:
a) Click anywhere in the area of RTDV where you see the scrolling yellow text.
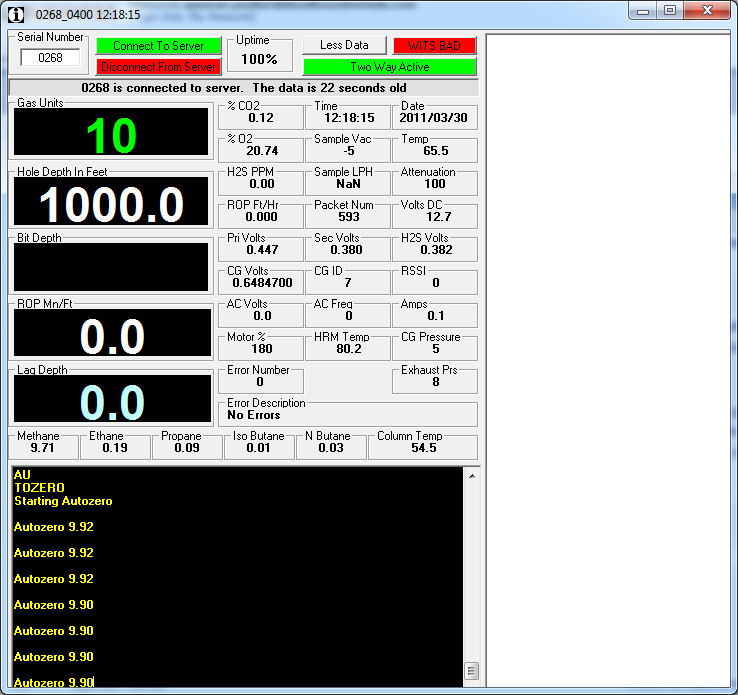
b) Type in the word “AUTOZERO” (no quotes) and press <ENTER>. You should see something similar to the following (if you do not, try it again – it may take a few attempts depending on connectivity to the Bloodhound, where it’s CPU is in its interrupt cycle, etc.):
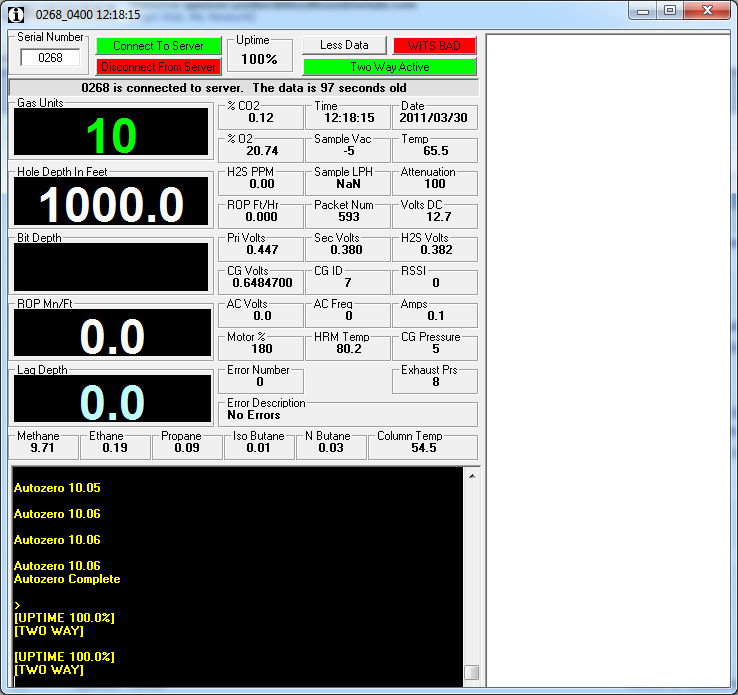
c) Allow the Autozero function to complete. When it is finished you will see something similar to the following screen:
4) Verify the results:
a) Examine the Bloodhound for a few seconds via RTDV.
b) Watch the gas units and see that they are somewhere between 0 and 20 units. If they are not, repeat steps 2 and 3 above.
c) It is advisable to run a lighter test on the Bloodhound and let it settle again to make sure the zero point holds. If it does not, check your attenuation (recommended setting is 100) and repeat steps 2 and 3 above.
Congratulations! You have remotely auto-zeroed the gas reading for your Bloodhound Unit!