There are times that it makes sense to update the Bloodhound’s firmware, whether for the purpose of issue resolution, needing a feature that is in a newer version of the firmware, etc. This article shows you how to update the firmware on-site with the Bloodhound and its USB flash drive.
PREREQUISITES:
1) You must have access to the Internet.
2) You must have a computer that has at least one free USB connection available.
3) You must be on-site with the Bloodhound – this exercise is not a remote tutorial.
HOW-TO:
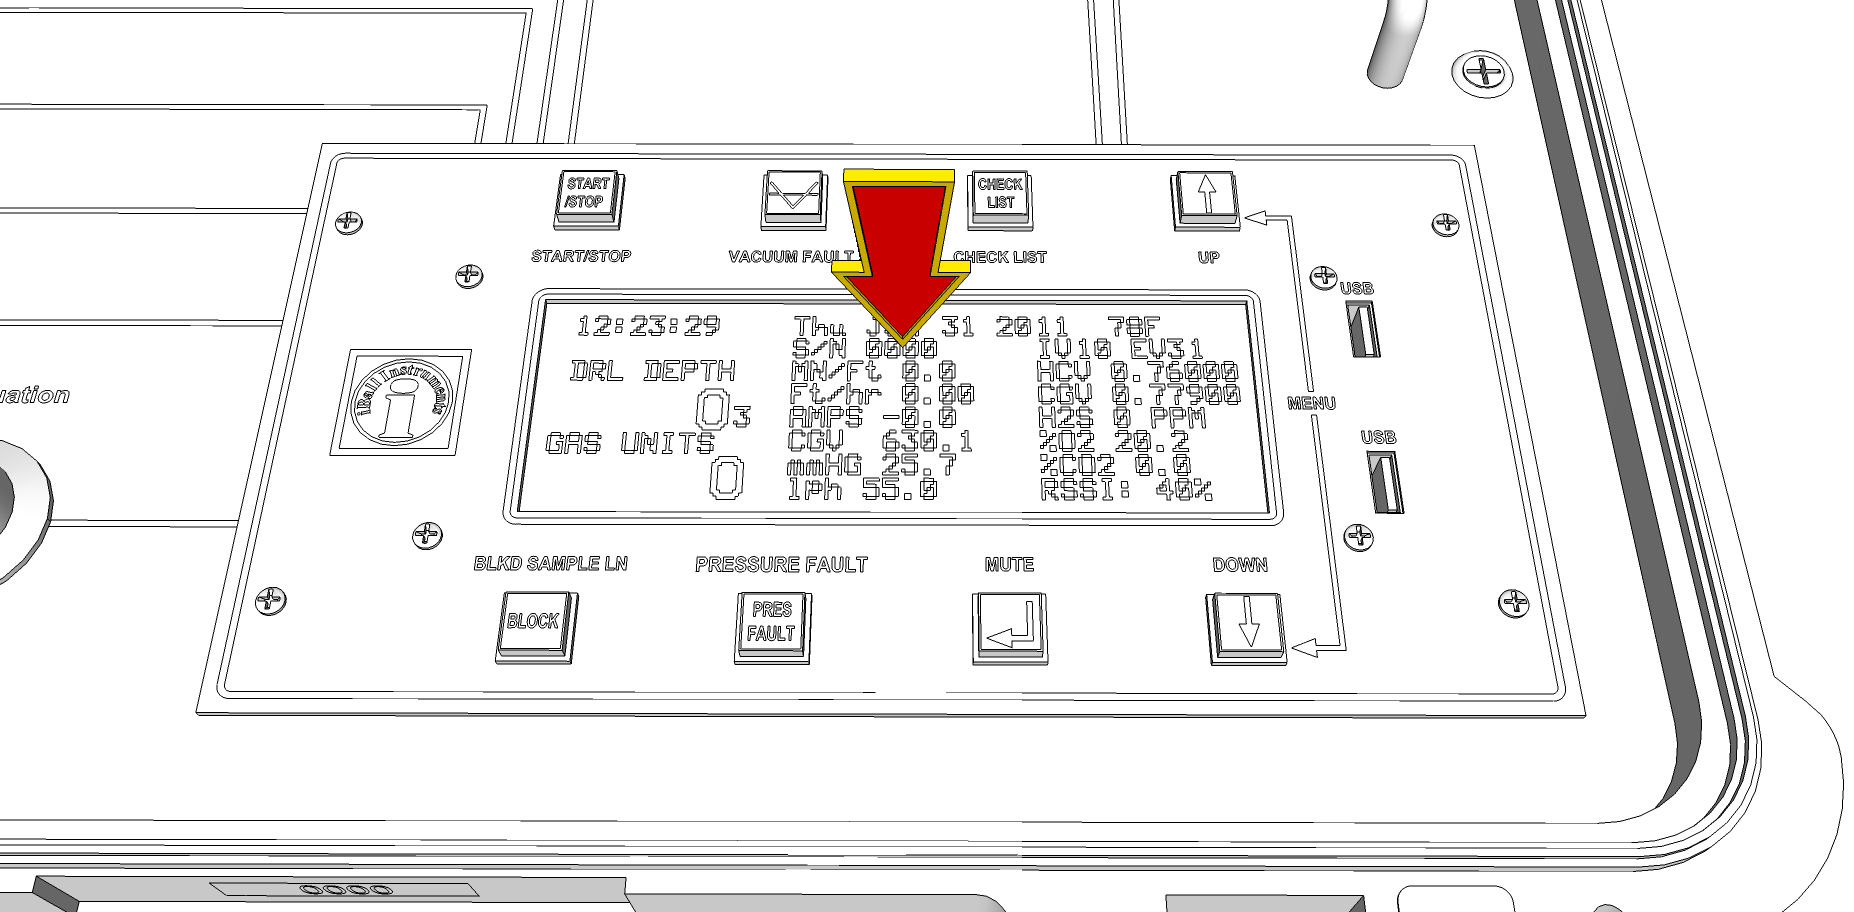
1) On the face of the Bloodhound, the second line has two values labeled “IVxxx” and “EVxxx” respectively. These represent the current firmware version numbers. Write these down for comparison at the end of the tutorial so that we can verify the upgrade was completed properly.
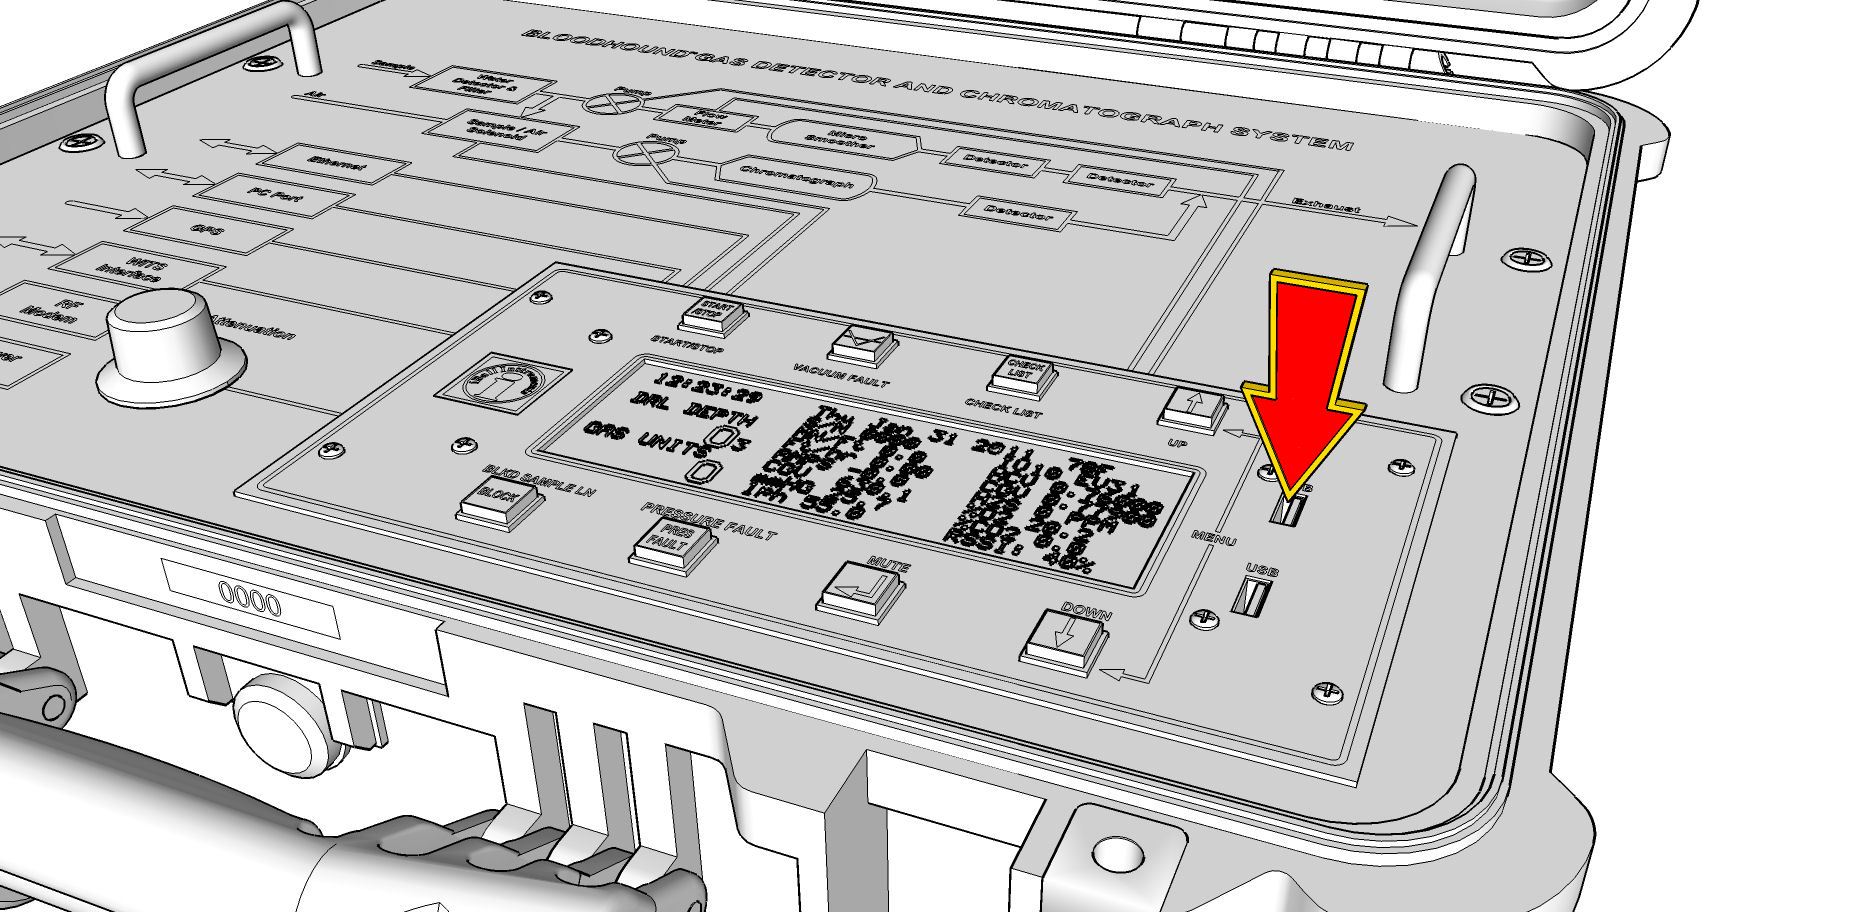
2) Look at the Bloodhound. Take special not of the USB Flash Drive that is plugged into the fact of the Bloodhound to the right of the display and buttons. Specifically take note of which port it is plugged into, and what direction it is facing, so you can replace it EXACTLY as it is currently inserted when you return it.

3) Unplug the USB Flash Drive from the Bloodhound and plug it into a USB port on your PC.
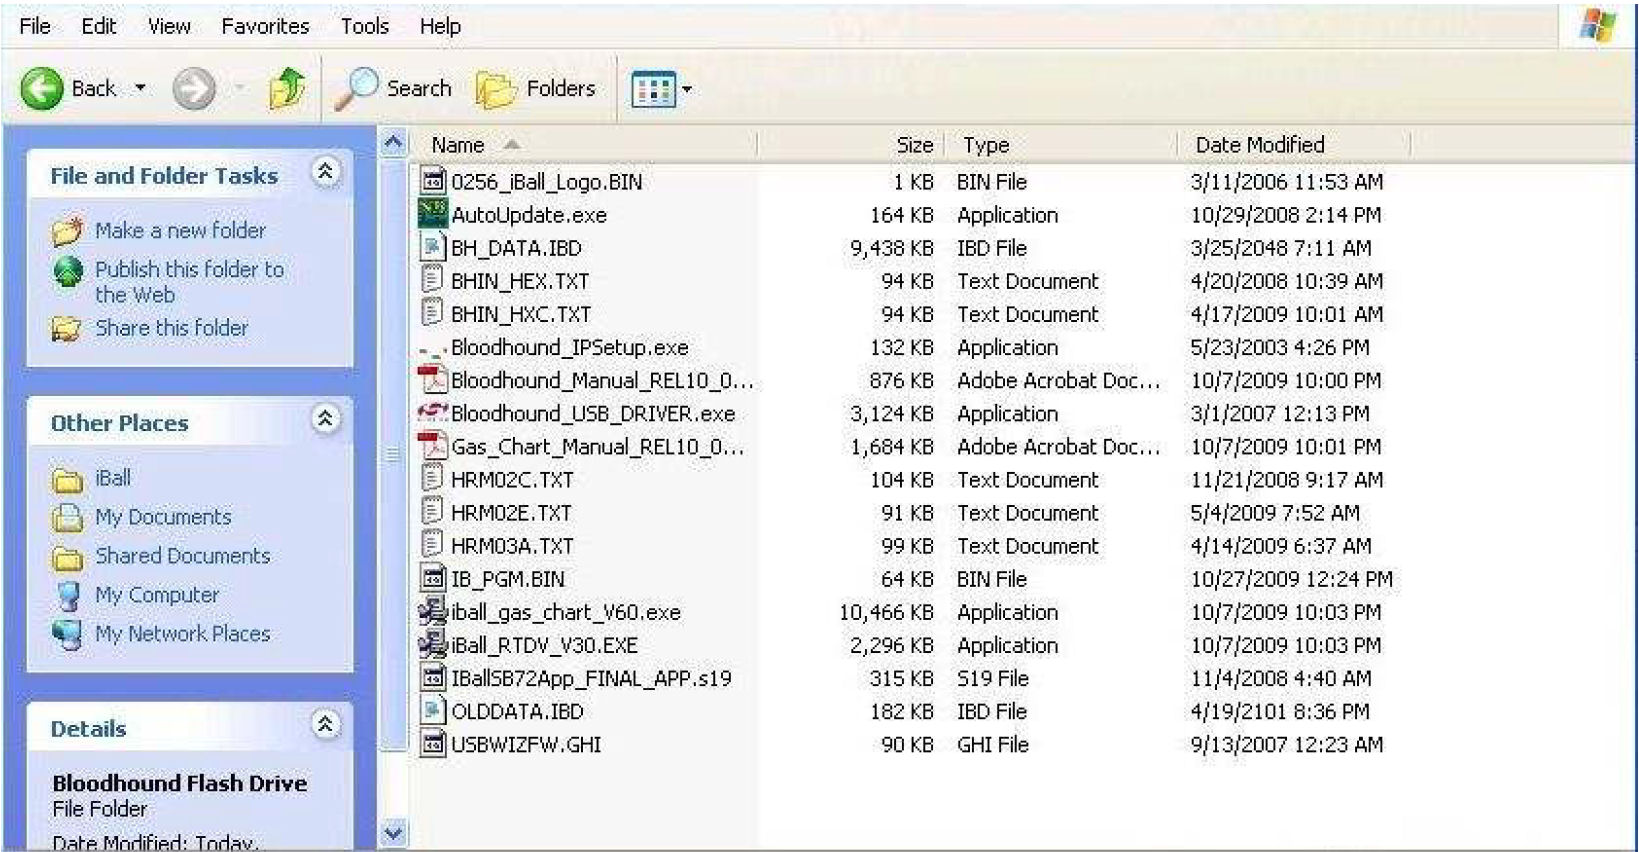
4) Let the USB Flash Drive properly mount, and then open it either by accepting the prompt, or by looking for it under “My Computer”. You should see something similar to the following contents:

5) Locate the file named “IB_PGM.BIN” on the thumb drive and rename it to “IB_PGM_OLD.BIN”.
6) Now copy the file that you downloaded (the new version of the firmware) onto the USB Flash drive.
7) As an example, the file you downloaded/copied is probably named something like “IB_PGM_199.BIN”. Take special note of the number in this file name, and write it down next to the numbers you collected in Step 1 above. Now rename this | file to, “IB_PGM.BIN”.
8) Double-check your work to this point as it is very important we correctly completed all of these steps.
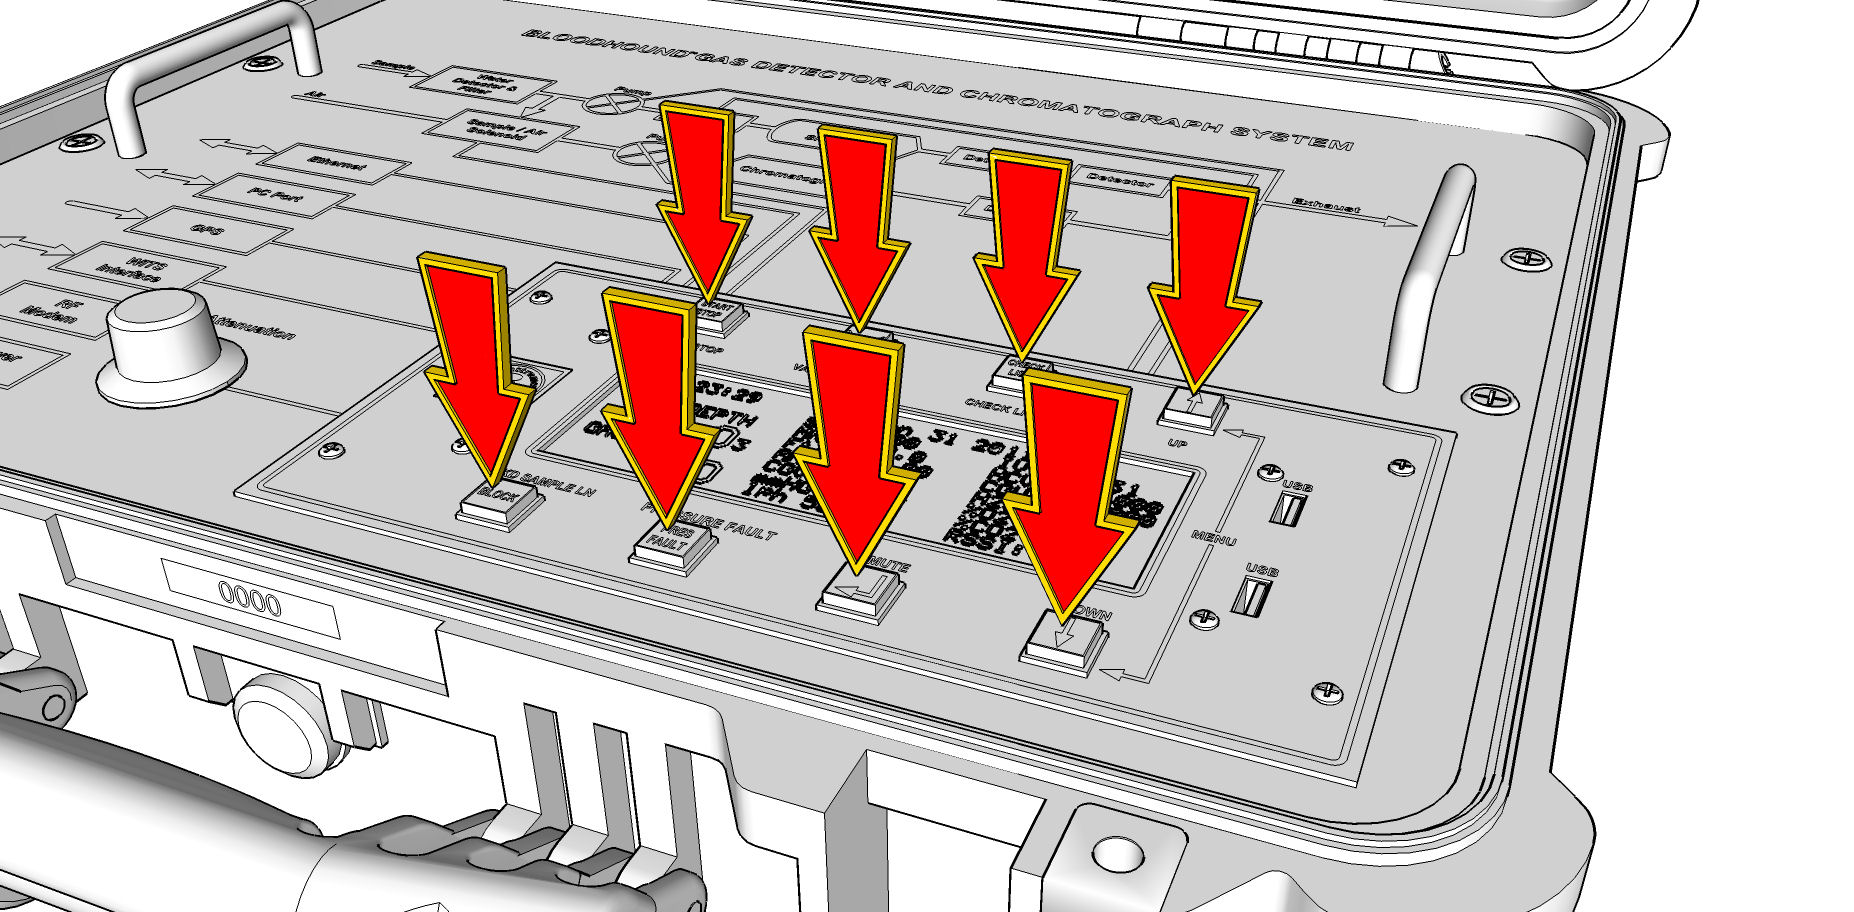
9) Now, while watching the face of the Bloodhound, use both hands to press down all eight (8) of the Bloodhound’s buttons for a couple of seconds. If you have done this correctly, you should see some activity on the panel to the effect that it is loading up the USB Flash Drive and the new firmware.

10) Wait for the process to complete (this could take up to a minute or so).
11) Once the process has completed, look at the Bloodhound’s display, on the second line, and note the “IVnn” and “EVnn” numbers and compare them to those collected in Steps 1 and 8 above. One of these should match the number collected in Step 8, and they should no longer both be the same as they were in Step 1 above (although one may still match, both should not).

12) If this did not work correctly, please repeat the tutorial -it is likely something was not properly renamed, or something simple happened which caused the Bloodhound to re-load its prior firmware.
13) OPTIONAL: You may reboot the Bloodhound at this point to ensure it is refreshed with the new firmware, and a fresh boot.
CONGRATULATIONS! You have upgraded the Bloodhound’s Firmware!