PREREQUISITES:
1) You must have a working Internet conection.
2) You must have a working copy of iBall Instruments Gas Chart installed. You can get a copy from: https://iballinst.com/download/
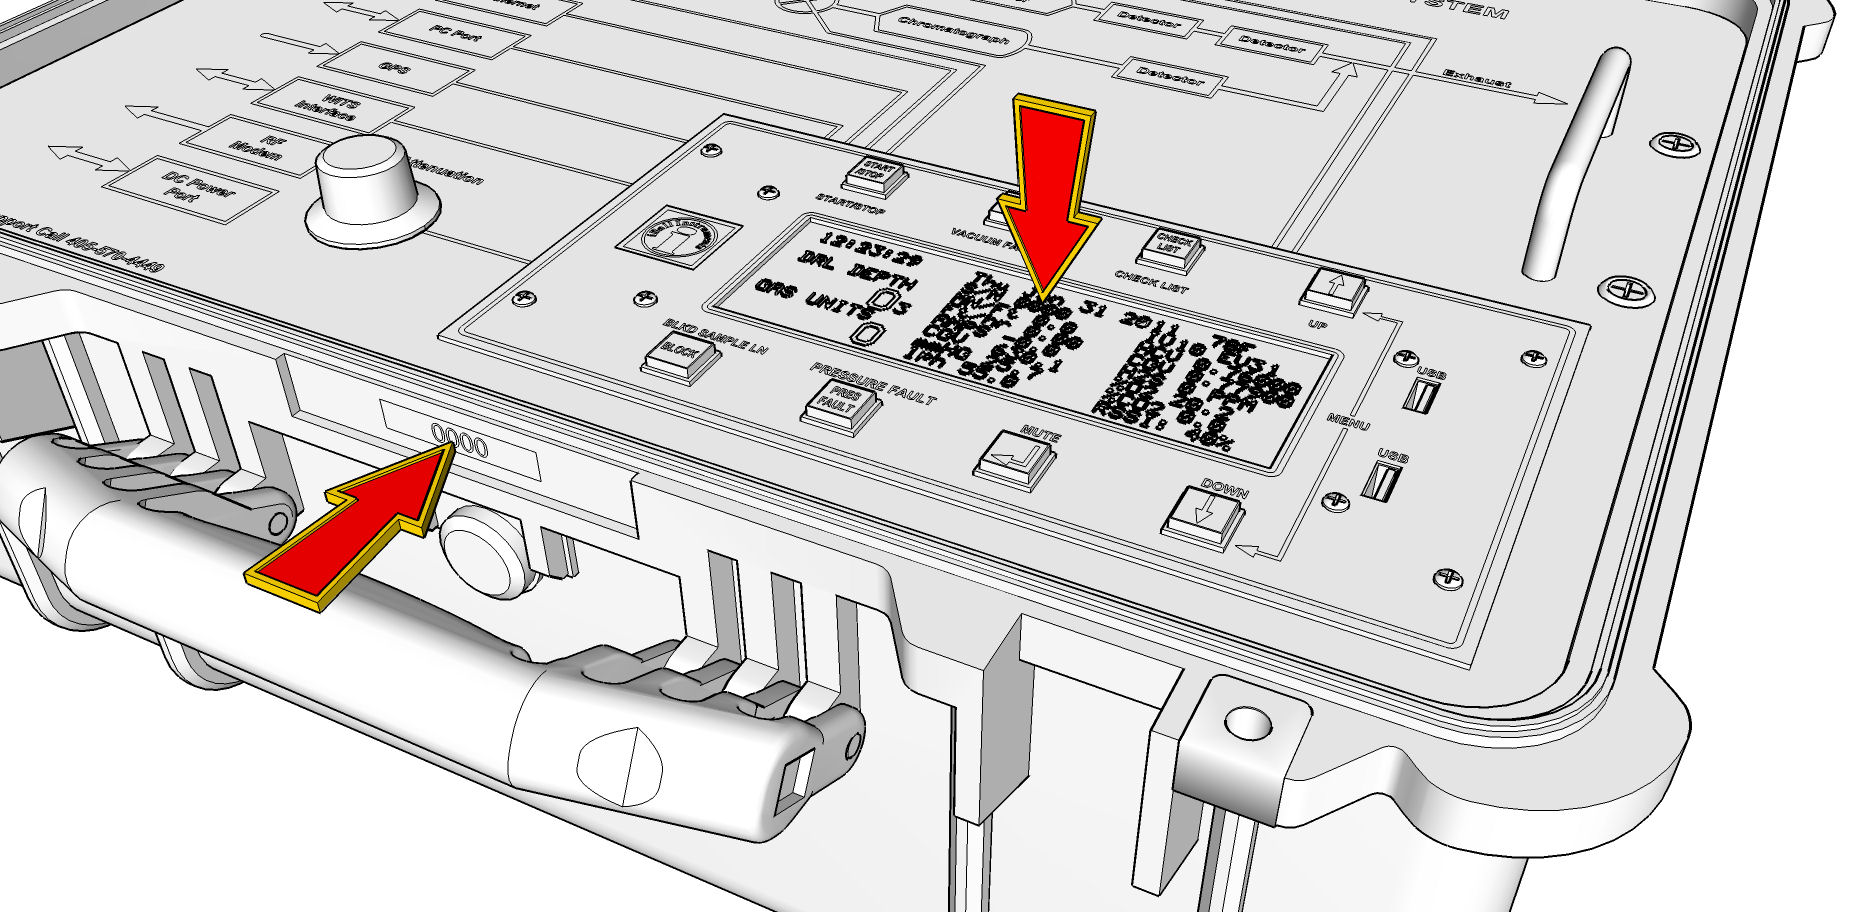
3) You must have the ID Number of the Bloodhound you wish to log. It is located both on the display and on a sticker on the front of the Bloodhound near the handle (you may have to call the logger in the trailer to get this information if you do not have it):

4) For a good conection and valid data, you must have the Bloodhound you wish to log on-line and it must have a valid conection to the iBall Internet Servers.
5) You need to have the correct IP addresses and Ports opened on your network firewall
HOW-TO:
1) Launch, iBall Instruments Gas Chart Software. Allow it to completely load.
2) Setup your conection to the Bloodhound via the Internet:
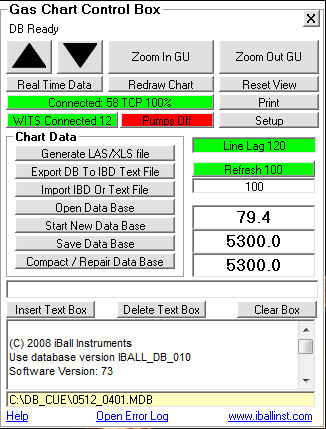
a) Right-Click your mouse anywhere on the chart where you have an arrow (not a double up/dosn arrow) to bring up the Gas Chart Control Box.

b) If the button that in this picture is green and reads “Connected…” (similar to the above image), click it until it is grey and reads “Bloodhound Forced Off”. If it is grey and reads “Bloodhound Forced Off”, go to the next step.
c) On the Gas Chart Control Box, click on the button that says “Setup”.
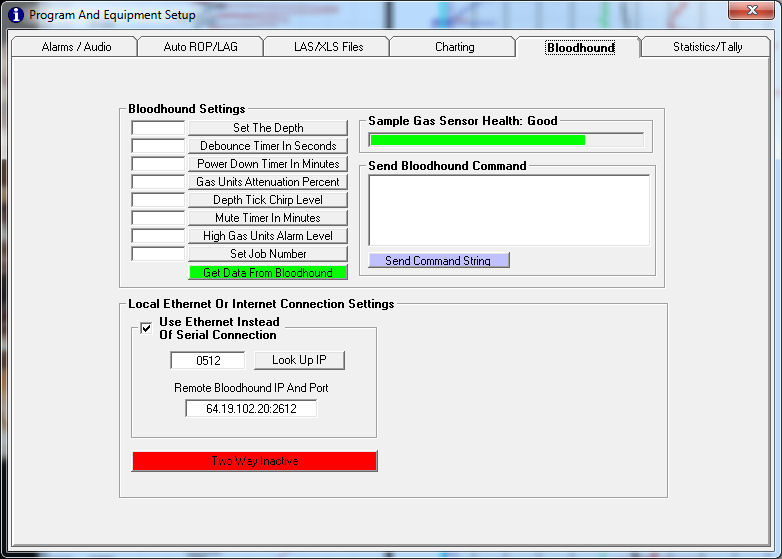
d) Select the tab that reads, “Bloodhound”.

e) In the lower-left hand portion of the screen you will see a section labled “Local Ethernet Or Internet conection Settings.
f) Make sure the box labeled “Use Ethernet Instead Of Serial conection” IS CHECKED.
g) In the field to the left of the button labeled “Look Up IP”, type in the 4-digit serial number of the Bloodhound you want to log remotely.
h) Click the button labeled “Look Up IP”. (As a sanity check, make sure the port number changes in the window below labeled “Remote Bloodhound IP and Port”).
i) Close the “Program and Equipment Setup” window.
e) Now click the button that says “Bloodhound Forced Off” once, and wait for it to connect. (It should look similar to the “Gas Chart Control Box” image above).
2) Start a New Database:
a) Right-Click your mouse again anywhere on the chart where you have an arrow (not a double up/dosn arrow) to bring up the Gas Chart Control Box.
b) Click on the button that says “Start New Data Base”.
d) Give the database a completely new and unique name, and click “Save”.
3) If you see the green “Connected…” button in the Gas Chart Control Box as mentioned before, and your chart is blank, you are now remotely logging the well from the point at which you started a new database. A few special notes to take into consideration are:
a) As time passes, the right-hand portion of the screen (the time-based graph) will scroll and data will show. Until some time passes, there will be no data here.
b) As new drilling depth passes, the left-hand portion of the screen (the depth-based graph) will scroll and data will show. Until some new drilling depth passes, there will be no data here
c) Whenever you start a new database, you need to let the “Bottoms Up” time pass before any gas data will show on the depth-based chart to the left as this is a “lagged depth” chart. Your bottoms-up can be determined by bringing up the Gas Chart Setup screen, and going to the tab that reads “Auto ROP/LAG”.
Congratulations! You are now remotely-logging a well with iBall Instruments Gas Chart.