PREREQUISITES:
1) You need a valid and working Internet connection. Please test this before proceeding.
NOTE: If you have just navigated to and are viewing this article, chances are you have a valid and working Internet connection.
2) You need to know the Serial Number (3 or 4 digits) of the Bloodhound Instrument that you have deployed.
3) You need an Adminsitrator-Level Username and Password for your Bloodhound Unit (the one you use to login to iBallRemote). If you do not have this setup, please contact Bloodhound Support.
4) You need to have the Real-Time Data Viewer installed first.
5) Know why and when to set a Job Number. You have to do it only when you’ve made a large up-hole move, such as:
a) Starting a new well.
b) Starting a new side-track.
c) A large up-hole adjustment.
The reason for this is that starting a new Job Number on the Bloodhound tells it to start a completely
new database using depth as the primary key. In the process, it also does the following:
a) It initializes and starts a new database and chart on iBallRemote.com
b) It erases the backup of the last Job Number’s data on the Bloodhound, makes one (1) copy of the current database, and puts it in the single backup location on the Bloodhound, and it creates an entirely new database that will now be started with the new Job Number.
BOTTOM LINE: Know when to start a new job number – if you have any questions, contact support.
HOW-TO:
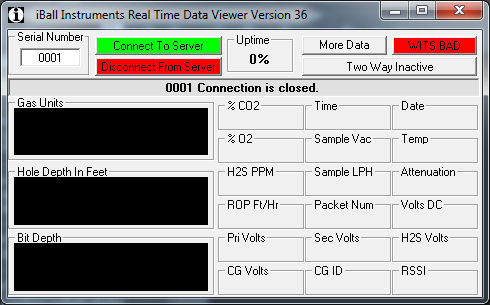
1) To run the Real-Time Data Viewer, either double-click on the Desktop Shortcut called “iball_real_time_data” that was created when you installed the programs, or run it via the Windows Start Menu (Start–>All Programs–>iBall Instruments–>iBall Real Time Data Viewer). You should see a screen like this:

2) In the upper-left part of the screen, type in the Serial Number of the Bloodhound Device where it asks for it.
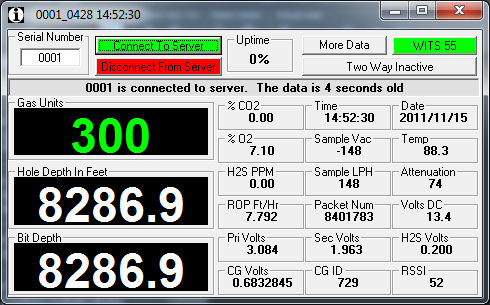
3) Click on the “Connect to Server” button. Ensure this turns green – if it does not, re-check the serial number you entered and your Internet connection. It should look something like the following screen (with the serial number you entered and your well data if it connected properly):

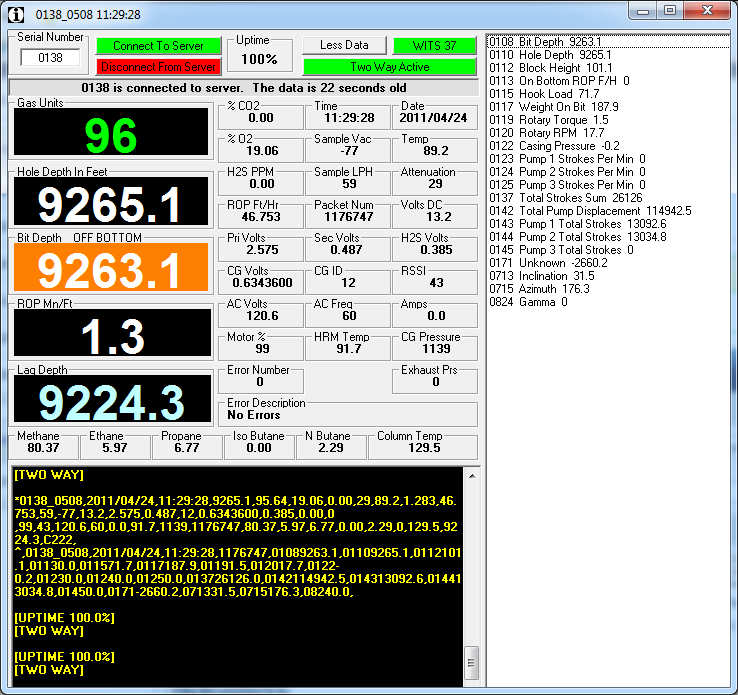
4) Click on the “More Data” button. Ensure that Yellow Text is scrolling by at regular intervals (about every 6 seconds or so). The screen will expand as follows – you want to make sure you see the “scrolling yellow text” in the lower-left hand corner as you will need this section visible (and being updated) to complete the Job Number change.
NOTE: Look for “[UPTIME 100%]” in the yellow text – if you see this, you have a strong enough connection to the Bloodhound to make changes. If it’s less than this, you can still try – it just might take several attempts to get it to work.

5) Click on the red “Two-way Inactive” button. Here a screen will pop up labeled “Unlock Connection” that requires you to enter your known Administrator-level username and password. Enter them, and click on the button that reads, “Send”. If entered correctly, the “Two Way Inactive” button will now read “Two Way Active” and will turn green. You should also see a message in the Yellow Text area (scrolling by) that reads, “[TWO WAY]“. You are now setup to change the Job Number. The screen above actually shows the “Two Way Active” state.
6) Click at the bottom of the Yellow Text area, and type “Echo on” then hit <ENTER>. You should see the words, “Echo on“, and a Carat symbol (“>“) scroll by in the yellow text.
7) Type “SETJOBNUM” a space, the 4-digit job number you wish to set on the Bloodhound, the word SET and press <ENTER>. EXAMPLE: “SETJOBNUM 0123 SET“, to set the job number to “0123”.
8) To verify you set the job number, you will see something that says “Job Number….” in the yellow text, and the prefix to the “numbers” that come by will now contain the Bloodhound Unit number and the new job number (EX: “0001_0123”. You will also see this on the top of the Real-Time Data Viewer window to the right of the iBall Instruments Logo.