This article coveres one of the two methods of connecting your Bloodhound to the Internet. Specifically, it addresses how to use the on-board GPRS Cellular Data Modem to make this connection.
PREREQUISITES:
1) You need to be on-site with the Bloodhound.
2) You may need a small pair of needle nose pliers or a small adjustable wrench to properly, tighten the coaxial cellular phone connection.
HOW-TO:
1) CONNECT THE CELLULAR ANTENNA: If you already know how to accomplish this, you can skip to step two (2) below – otherwise, the instructions for connecting the antenna properly are below:
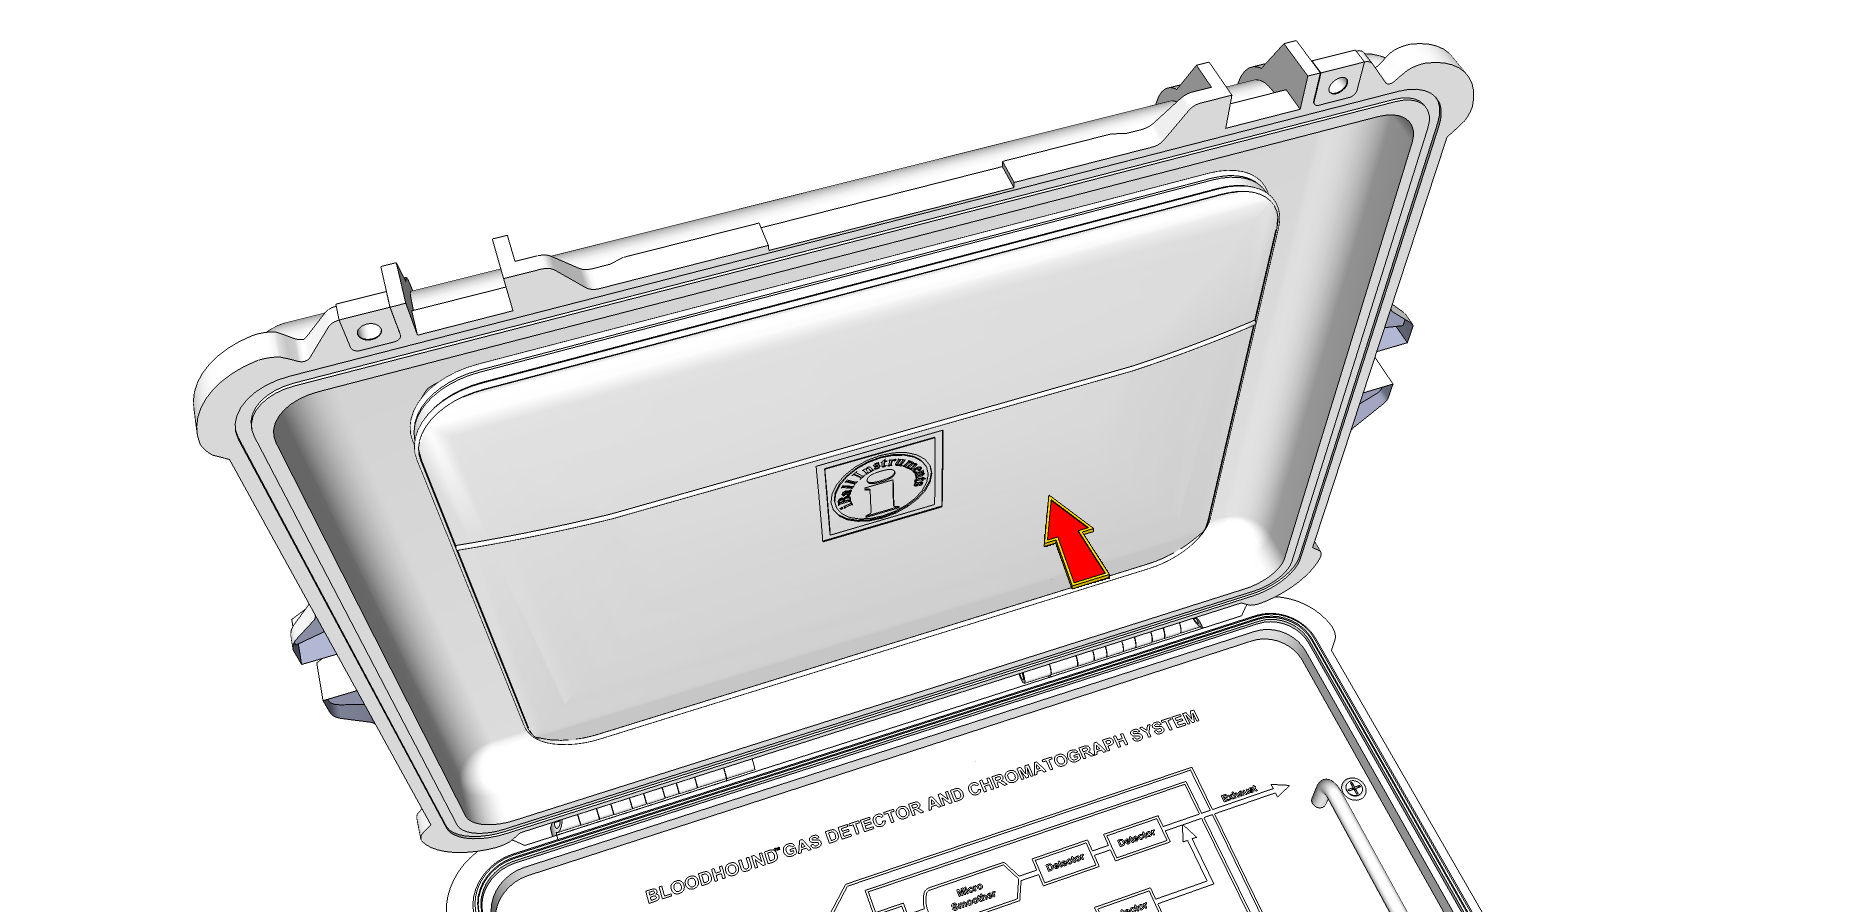
a) If it is not open, open the lid of the Bloodhound.
b) On the underside of the lid is a soft pouch (shown in the figure below):
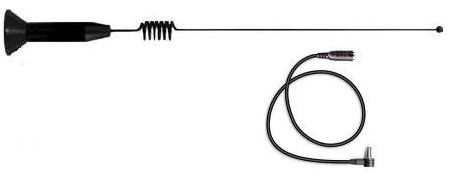
c) Find one of the two (2) GPRS cellular modem antennas (shown in the figure below), remove it from the pouch, and unfasten the wires.
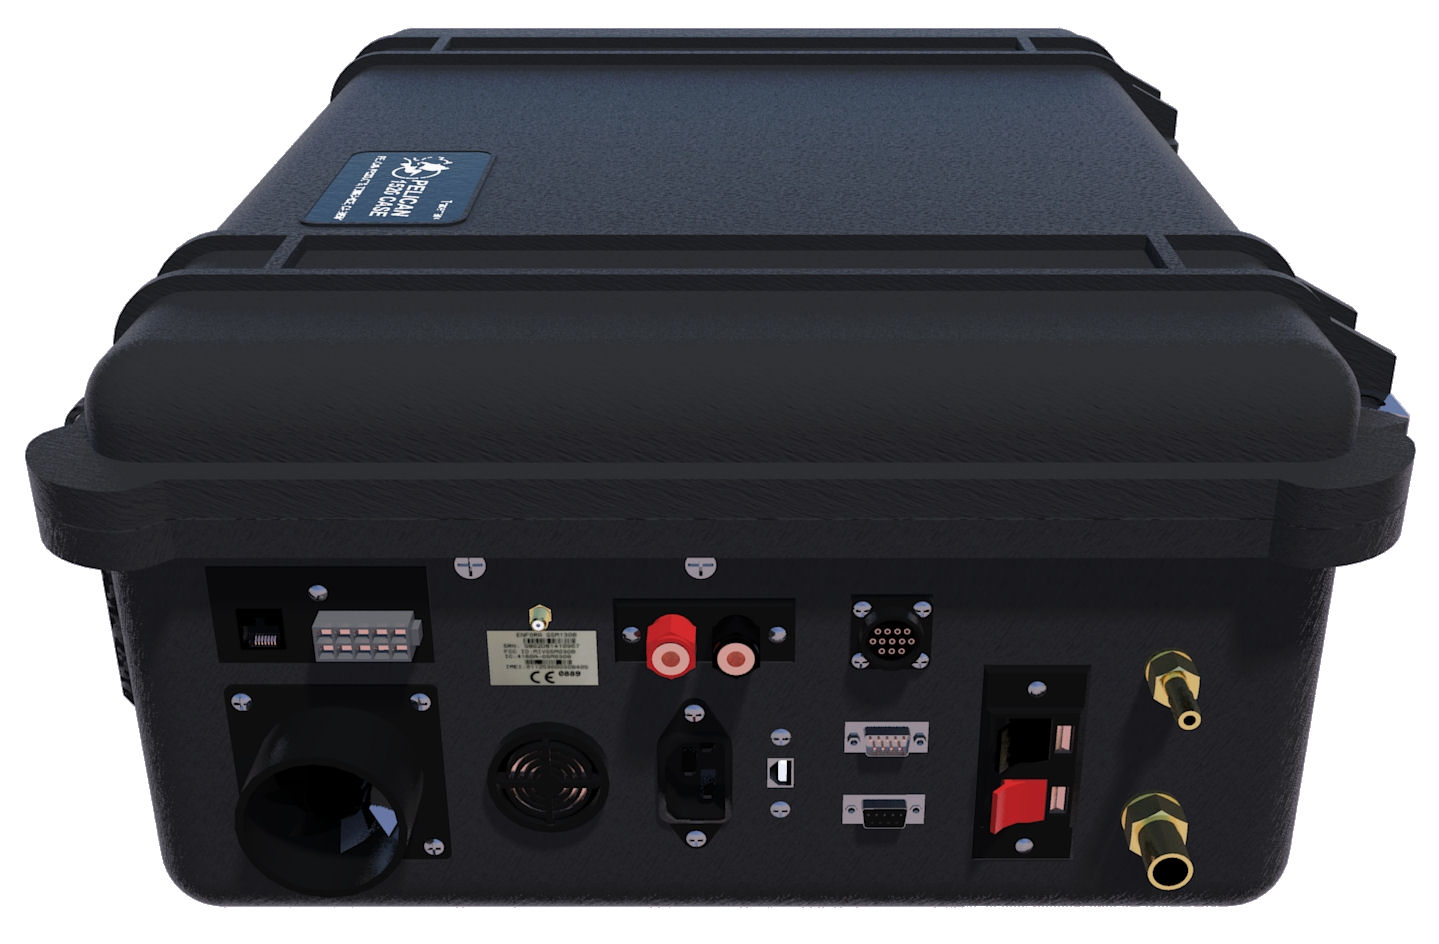
d) Take a look at the left hand side of the Bloodhound where all of the connections are located (see the figure below for what this looks like):
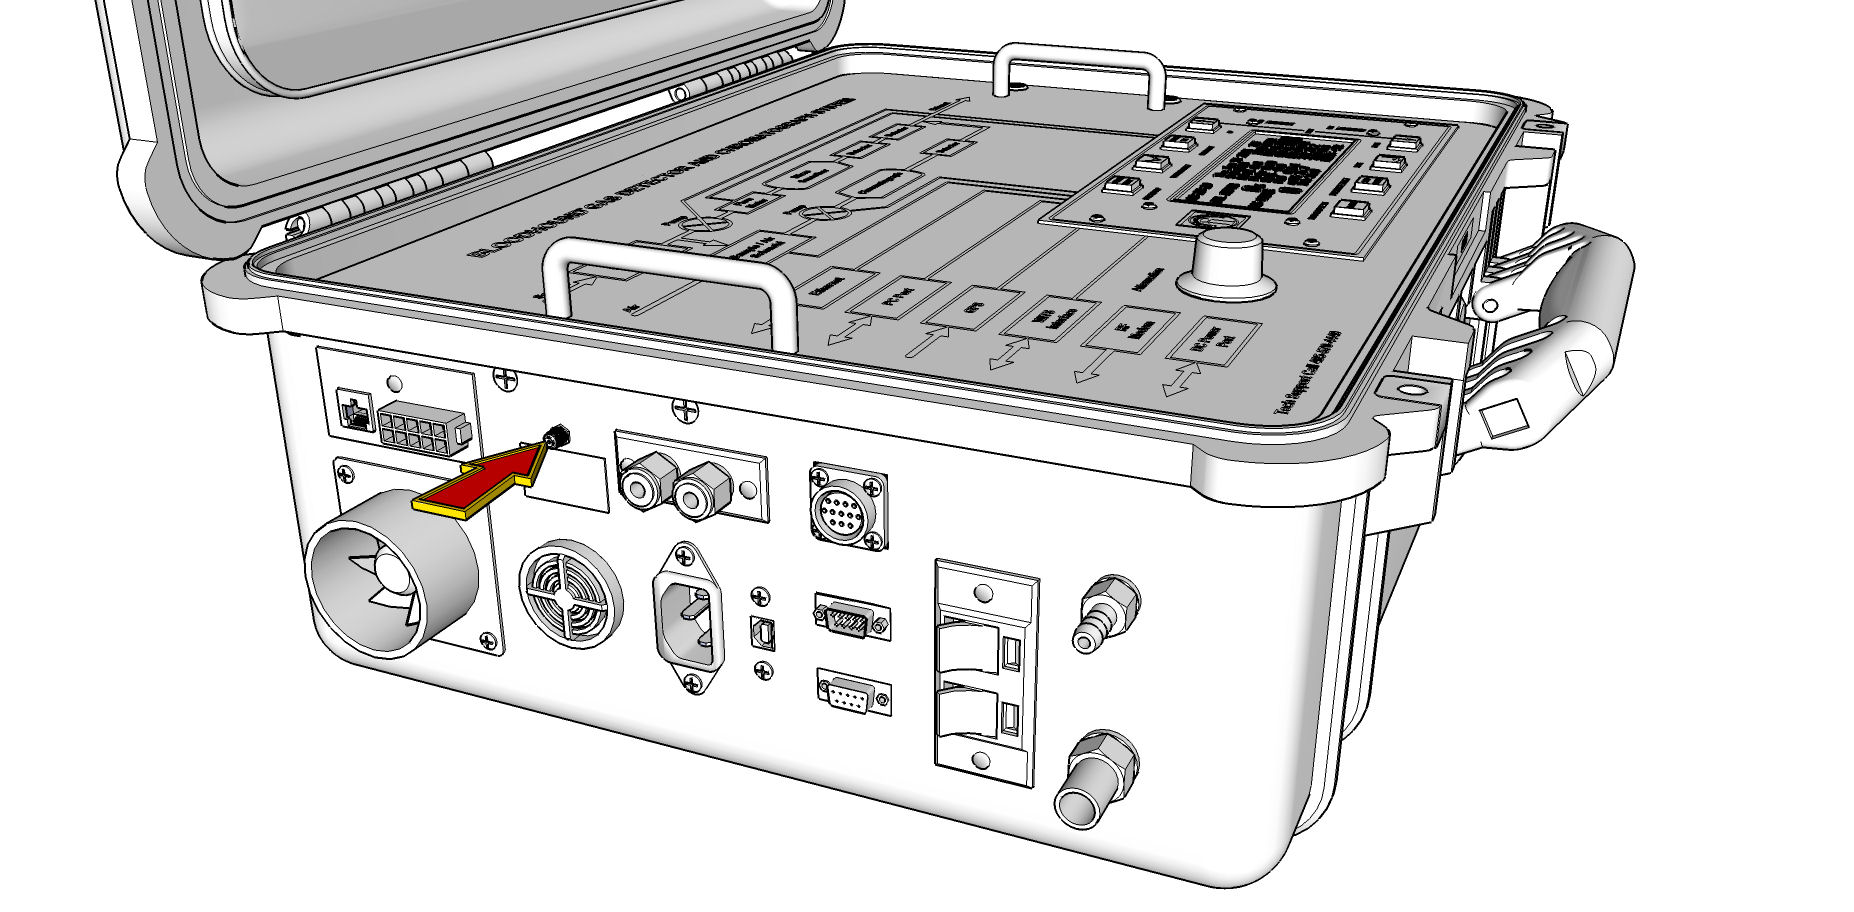
e) The GPRS antenna gets plugged into a very small coaxial connector on the Bloodhound (identified in the figure below). Securely screw this connection into the Bloodhound (but do not overtighten it).
2) PLACEMENT OF THE ANTENNA: To minimize the liklihood of radio-frequency noise on the Bloodhound’s sensor block (produced by the cellular antenna), place the antenna as far away from the Bloodhound as possible. Also, to increase tranceiver efficiency, place the antenna as high as possible, and outside of any metal obstruction (such as on the roof of the trailer).
3) POWER THE BLOODHOUND ON: If the Bloodhound is not powered on, power it on now, and wait a few minutes for it to fully boot up.
4) VERIFY CONNECTIVITY: There are two pieces of data that you need to watch in order to verify that the Bloodhound is connected to the Internet (from the Bloodhound’s perspective that is):
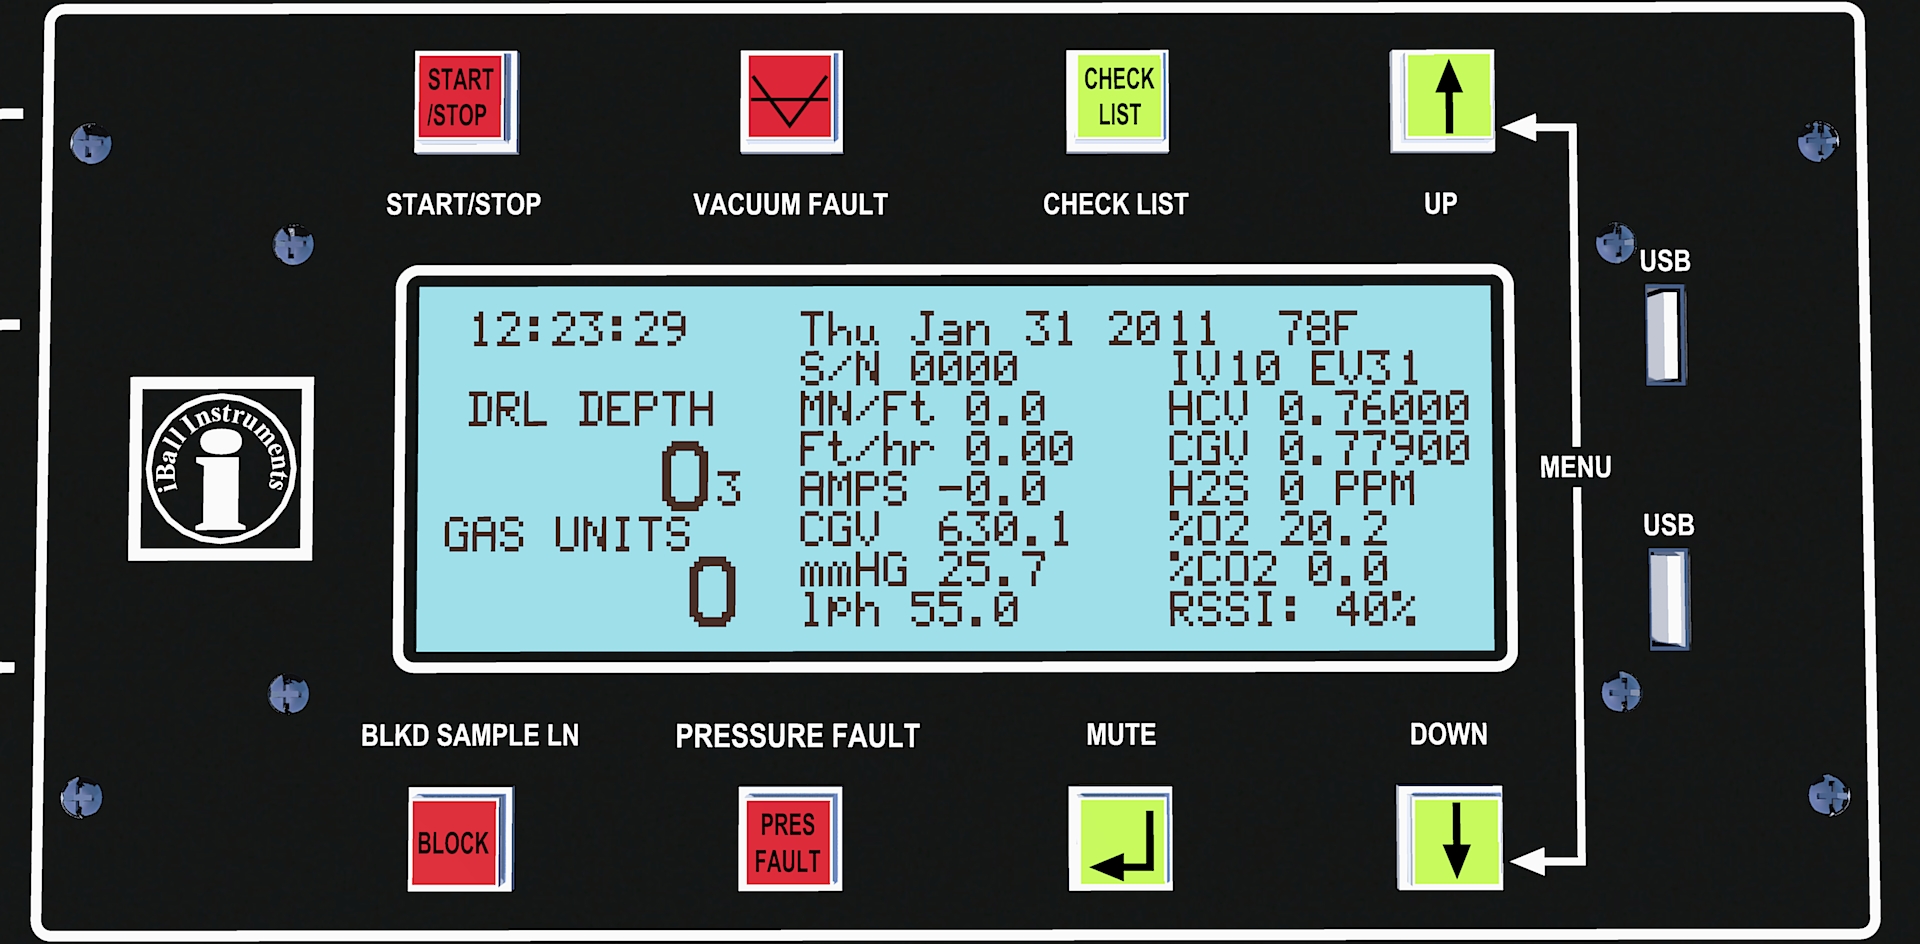
a) If you look at the face of the Bloodhound and find the LCD, there is a “field” in the bottom right of this LCD that is “rotating” through a number of values (see image below to find where this field is). Watch it for a few seconds to see it rotate through the values.
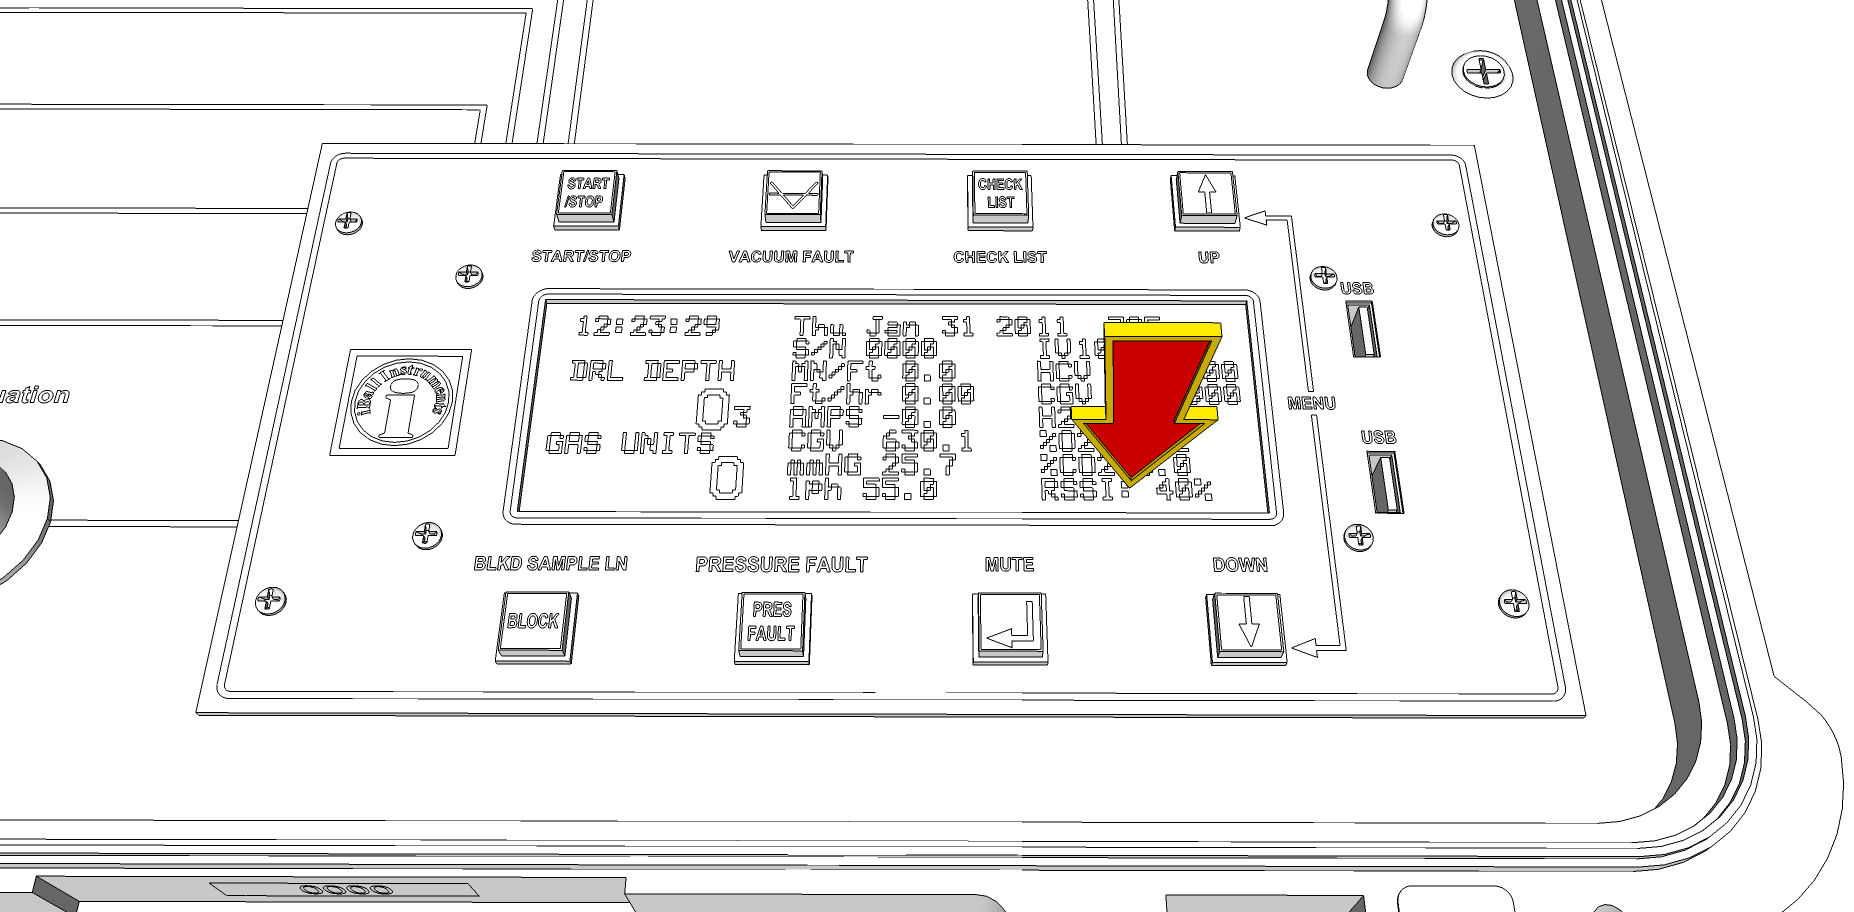
b) Wait for the “RSSI” value to appear and note the number (%) it reads. An RSSI of 20% or above is generally sufficient to make a connection, although the higher the reading, the better. We like to see RSSI above 30% for reliability sake. You can generally improve this by raising, or even just moving the antenna around. You can also try the other (spare) antenna in the Bloodhound’s pouch to see if it is any better. A close-up of this panel clearly showing the RSSI field (in this case 0%, which means no antenna is connected) is shown below.
c) Now check the same rotating field and wait for the value of “MODEM” to appear. It will generally appear with a couple of code letters after it and possibly a number that follows.
i) The value of “MODEM CN” means that the modem is connected and working properly If you see “MODEM CN”, your Bloodhound is connected to the Internet and you are done.
ii) The value of “MODEM NC” with a trailing number means the modem is still waiting to make a connection to the Internet. The number is a “countdown” to the next interval at which the modem will try to connect – wait for this to go to zero, then wait for roughly another thirty (30) seconds, and the modem should eventually connect.
iii) NOTE: You may need to wait several minutes for the Bloodhound to make a connection to the Internet. If you have a good RSSI% (above 30% or so) and have waited for more than 10 minutes or so, consult the article entitled, “How to Troubleshoot a Bloodhound Cellular connection or Modem Problem” in the section called “OTHER ARTICLES OF INTEREST” at the end of this article.
Congratulations! You have connected your Bloodhound to the Internet via GPRS Modem!