This article specifically covers setting up a Geolograph on the Bloodhound, including the physical connection of the Geolograph, testing the geolograph connection, and the related settings on the Bloodhound which control the Geolograph.
PREREQUSITES:
1) While it is advisable to have a Bloodhound on-site to run through the settings on the Bloodhound and the connections, it is not required – this can be an academic-only article as well.
2) If you have a Bloodhound on-site with you, a paperclip is a useful tool for testing the Bloodhound Geolograph connections.
3) You may need to know how to setup “registers” on the Bloodhound. If you do not know how this is done, see the “OTHER ARTICLES OF INTEREST” section at the bottom of this page, and look for the article on “How to (Locally) Set Registers on the Bloodhound”.
HOW-TO SETUP A GEOLOGRAPH ON THE BLOODHOUND:
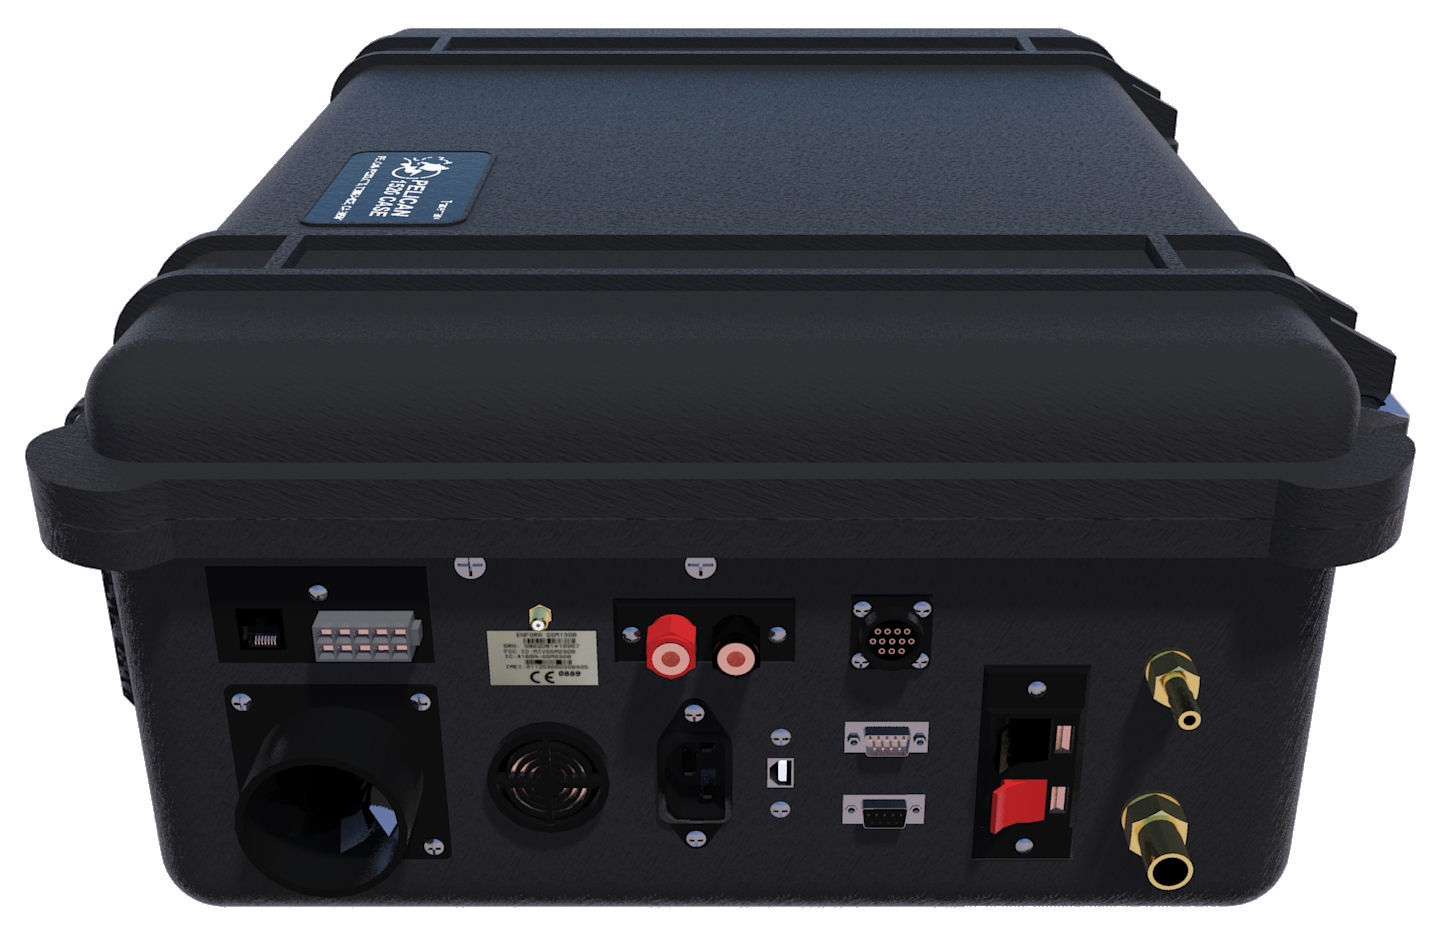
1) Take a look at the left hand side of the Bloodhound where all of the connections are located (see the figure below for what this looks like):

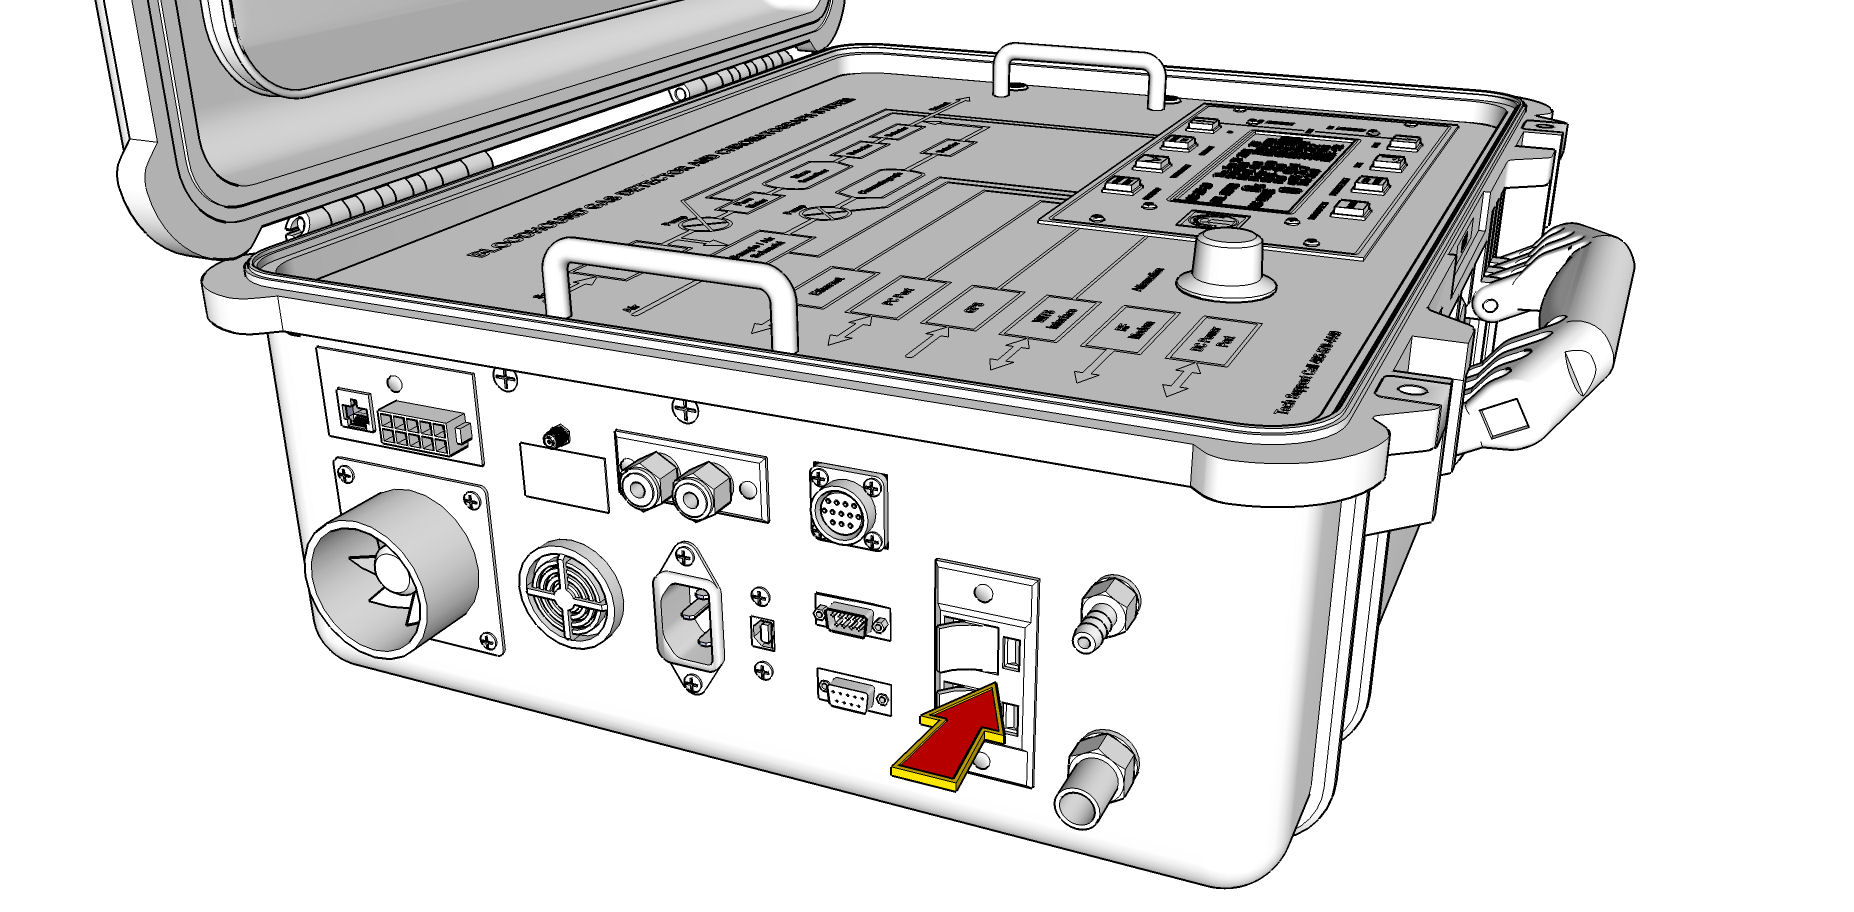
2) CONNECT YOUR GEOLOGRAPH: If you look at the figure below, you will find the geolograph connectors, red and black. They look like speaker-wire connectors. There is no specific wire recommended for the geolograph, but you want one that is durable. Making sure the wire has bare-ended leads, plug them into the speaker-wire connectors identified below. That’s it for connecting the geolograph.

3) KNOW YOUR GEOLOGRAPH REGISTERS: Registers on the Bloodhound are numberic “key-value” pairs, the first representing the register number, and the second the value set for that register number. The table below identifies the registers specifically applicable to geolograph configuration and what they mean:
| REGISTER | VALUE RANGE | DEFAULT | WHAT IT DOES |
| 25 | 1 to 120+ | 10 | DEBOUNCE TIMER: When a geolograph input closer “drags” across the connector (for example when drilling excessively slow), it may “click” multiple times. This register sets the number of seconds after a single “close” event is detected on the Bloodhound that the Bloodhound will wait until it will accept another “close” event. For example, if set to 10, when you manually close the Geolograph, it will click a foot – then for 10 seconds, no matter how many times you close it, it will not chalk up another foot. |
| 32 | 0 to 255 | 1 | FEET PER CLOSE: Number of feet that the the Bloodhound will advance the depth counter when it detects a geolograph “close” event. This is a whole number, and by default it will advance one (1) foot upon close. If set to 0, the geolograph is disabled. |
| 33 | 0 to 255 | 180 | GEOLOGRAPH NOISE ALARM LEVEL: If the geolograph is noisy, and those noise spikes (in number) are greater than this number, the Bloodhound will alarm and throw an error indicating a noisy geolograph. If set to 0, this alarm is disabled. |
| 34 | 0 to 255 | 0 | FOOT TICK CHIRP: This is the length of time (in milliseconds) that a “chirp” will be heard whenever the Bloodhound detects a geolograph “close” event. Setting it to 0 turns it off. |
4) TESTING YOUR GEOLOGRAPH CONNECTION: Using a paperclip, or similar item, make a manual connection across your geolograph connections at the Bloodhound. Your depth should advance by the number of feet set in register 32 above.
Congratulations! You now know how to setup your geolograph on the Bloodhound!